Beef Bone Broth

OK so I have made my own stock before with chicken and turkey, but I was more intimidated to make beef bone broth. With the chilly temps today and a few little ones needing an extra immunity boost, I knew it was time to just jump in and get this going! Our pediatrician highly recommended that we incorporate homemade bone broth into our diets on a regular basis, so here we go! I followed a lot of the steps from this recipe from Nourished Kitchen http://nourishedkitchen.com/beef-stock-recipe/

I started out with 9 lbs of assorted organically raised beef bone parts. I consulted the farmer directly on this since I figured he’d be a pretty good resource. I had a bag of oxtails, a few feet (cross-cut), several split marrow, a hefty beef shank with a little meat on it, and a few other things I should have written down. So I pulled out my massive roasting dish, set the oven to 400 degrees, drizzled olive oil down and put all that in the oven for a bit.

The best thing is to save a bag full of veggie ‘scraps’ for your broth as you chop veggies for meal prepping. I hadn’t been saving them up to this point, so for my first attempt I just chopped a few bunches of organic celery and used the ends and leafy parts, threw in a bag of organic carrots, several organic onions and about a pint of organic mushrooms. Roasting veggies makes them taste AMAZING, so why not do that with the stock, right? I threw all these chunked up veggies onto the top of the bones and let it all roast together. I left them in for about an hour and a half (until I knew I had to move on to the next step and still make it to bed at a decent hour).

20141102-065958.jpg
This is the part I don’t have an exact science for, since the bones and amounts that I have are so different each time. I have a massive stock pot so I pulled that out onto the stove and then got out my large crock pot as a back-up simmering station.

I divided all of the roasting pan goodies into the stock pot and crock pot, filled them both up with water and brought it to a boil. Once it was boiling, turned it down to a simmer and added in 2 Tbsp of organic apple cider vinegar and a dash of cinnamon (because I cannot make a beef dish without it lately). I’m obsessed with cinnamon.

Do NOT add salt to your bone broth, as it will condense down and can become too much as the stock thickens. Better to add it to the final dishes as needed when you actually use the broth.

So it has been there on a low simmer all night and the house smells yummy.

20141102-074436.jpg
Can’t wait to sip some of this for our lunch today! It is good straight up with a dash of seasoning, or I add it as the base for ALL of my home made soup recipes which we make frequently…especially in these chilly months! Let me know how yours turns out!

Roasted Butternut Squash Soup

Nothing says Happy Halloween like a fresh pot of homemade roasted butternut squash soup!

The more I have learned of the evils of candy (sounds dramatic, but seriously most of the stuff is SO dangerous and wreaks havoc on our systems and especially the kiddos) the more I want the fall festivities to be focused on family, real food and great memories! So Halloween will be dressing up creating costumes, and enjoying our bowl of delicious butternut squash soup while passing out glow sticks to our friends and neighbors.

No sugar highs, no tummy aches, no neurotoxins flooding their bodies, just good real food and fun! They really don’t care about the candy if it is not made to be about that, so for now we’ll go with this!

Delicious homemade butternut squash soup is SO easy with a little advanced prep. The key is to roast the butternut squash a day or two before you need it.

Here’s the recipe:

About 4 small organic butternut squash

To roast, cut the squash in half, scoop out the seeds and roast face down on a baking sheet greased with olive oil for about an 30 min to an hour at high heat (400). Roast until soft. Then scoop the squash out of the skin and discard the skin.

3-4 organic onions, chopped
3-4 tbsp olive oil
32-48 oz organic chicken broth or stock
2 Tbsp chopped garlic
2 tsp ground cinnamon
1-2 cups milk of choice (I used flax seed milk)
2 Tbsp rosemary and thyme infused olive oil (made with essential oils)
Fresh organic dried parsley
Salt and pepper to taste

If you have pre-roasted the squash and just stored it in the fridge, this could not be easier.

Chop the onion and sauté it in the olive oil until caramelized.
Turn burner to low.

20141031-164211.jpg

Add 1 large box of chicken stock and the garlic and throw in all the roasted butternut squash.

At this point you can use an immersion blender, or transfer it in batches to a vitamix and purée it all. I add in 1-2 cups of milk and extra stock through this process to get all the good squash purée off the sides of the blender.

Once it is smooth and creamy, add ground cinnamon, drizzle a few Tbsp of the rosemary and thyme olive oil over the top and stir it in. This stuff is liquid GOLD for flavoring all my homemade soups.

Add in salt to taste and grind fresh pepper over the top. Crumble some fresh dried parsley on and enjoy!

20141031-164342.jpg

how to eat real food…really: GREEN SMOOTHIES!

Anyone that knows me knows that we LOVE our smoothies! We make them every morning and my 2 toddler boys BEG for these. It’s a great way to get a ton of fruits and veggies in right away and start the day right. Of course all our recipes are dairy free so the calories are kept at a minimum too.

My only regret in getting super amazing high powered blender is that I didn’t do it sooner. If there is one purchase we’ve made in the last few years that has contributed the most to our nutrition, the Vitamix wins hands down. Of course you don’t have to have a Vitamix to get healthy amazing blended things quickly, but man, it helps a lot. The best thing for us about it, is that it mixes everything so well you can hide a LOT of veggies in….and still have a delicious smoothie.

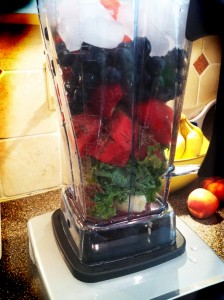
There are endless possibilities and you can throw in whatever you want, but here is our morning go-to smoothie recipe:kale green smoothie recipe

  • 2-3 bananas (not overly ripe b/c I don’t like too much banana flavor)
  • 2-3 stalks of kale (stalks removed – using the leaves only makes it less bitter)
  • 1-2 cups strawberries or 1/2 bag frozen (frozen are great to chill smoothie without watering it down)
  • 2-3 cups baby spinach
  • 1 fresh lemon, juiced (I juice in 1-2 oranges too if I have them)
  • about 2 cups organic rice milk (add more if needed to thin texture)

This is the base no-fail recipe that we love, but it’s also great for throwing in veggies that may need used up like cucumber or carrots! If not using any frozen fruit, add a handful of ice to chill and thicken it up. Despite the photo, I normally avoid blueberries in the smoothies (they love to eat them on the side) as I find they thicken up too much after sitting for a few minutes and are a really big pain in their straw sippy cups.

We also add a drop of Vitamin D to the cups before serving per our amazing pediatrician’s recommendation. It is a vitamin packed way to start the day, and fills them up with the good stuff before anything else!

How to eat real food…really:: READ LABELS!

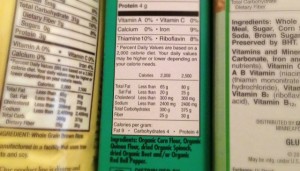
There is SO much that could be discussed when it comes to the topic of reading labels, food labeling and knowing WHAT it is you are actually eating. food labelsI hate to admit that up until a few years ago I rarely glanced at labels when buying food. I knew what I wanted to buy and eat and had been doing the same thing for years, so what was the big deal? Thankfully my son’s severe food allergies rocked our world in a GOOD way when it came to being aware of exactly what we were putting into our bodies…..down the the smallest ingredient.

I was in shock. I had no idea how much ‘stuff’ was in simple things I was buying. It was crap I could not pronounce, had no idea what it was and even worse, didn’t know what damage it was causing our bodies by eating it!

The goal in moving toward real food is cutting out the processed stuff.

Here are just a few tips when it comes to reading labels that you can try and implement to help you become more aware of what you’re buying!

Buy food that doesn’t need labeling! Fresh produce and pastured farm meats are obviously the best choice for your meals. There’s nothing to worry about when nothing has been done to the basic product! I’m not going to pretend like I’m an expert at this. We are often still looking for quick go-to stuff on days I have failed to plan, but even the ‘shelf stuff’ can be purchased wisely and changed to promote healthier eating. Buy local and organic as much as possible. This is by far the #1 change to make in eating clean, real food!

Buy identifiable ingredients! Take a little more time next time you shop and compare products. The first time I went to buy chips after starting to read labels, I realized that the brand I usually reached for had about 25 ingredients. what?!?! What was all that junk?? Picking up an organic option next to it I found 3 ingredients. 3 ingredients that I knew what they were. I felt more confident knowing what I was getting and consuming with the 2nd option and actually tasted better too. Buy items that have only whole, real, identifiable ingredients….things that you know are real. If you can’t pronounce it, best to avoid it!

Know what you want to avoid. Do your research when it comes to which ingredients are harmful to your family’s health and diet. People trying to eat real food are going to want to cut out things such as….

  • high fructose corn syrup
  • artificial sweeteners
  • flavor enhancers (like nitrates)
  • preservatives (like MSG)
  • hydrogenated oils
  • artificial colors and dyes

Learn common ‘hidden ingredients’ especially when health or allergies are involved. Many ingredients are disguised under different terms and may not always jump out as obvious. There is often milk or wheat in items that you would never think would have or need them included!! For example, if you’re avoiding dairy, learn which ingredients are actually dairy beyond the label saying ‘milk’ or ‘cheese.’ For a dairy allergy, you also have to learn that ingredients such as whey, casein, buttermilk, cream, hydrolyzed milk protein, lactose, milk solids, natural butter flavor, etc. are also dairy!
View a complete list of common dairy and dairy ‘hidden ingredients’ here.

Ignore and avoid the “marketing labels” used on packaging. Ignore the verbage such as ‘low fat’, ‘made with real fruit’, ‘100% natural’, ‘multigrain’, ‘no sugar added’, etc. There is very little regulation and most of these mean nothing and a few are clues that there are probably extra chemicals and additives that you really don’t want! Again, make sure you look at the actual ingredients list to know what you are buying!

The best method is not to rush through and throw away everything you have, but to make slow, determined changes every time you go to buy food. Read the label and know that big changes start with the little choices, so start making better choices now!


How to eat real food…really: MEAL PLANNING!

So this idea is rather basic, but makes or breaks my success every week without fail. If I fail to plan, our meals are such a struggle and it’s tempting to throw something less than healthy on the table to get it done fast! I’ve learned (ok, am STILL learning) the hard way that there is much less work and stress involved with planning ahead and the meals are much better, healthier and balanced! Eating real food is not hard when you know ahead of time what you’re going to do!

meal planning menu boardI’ve tried everything out there to get myself organized in this fashion, but without fail, our trusty menu board is the easiest and best way to make it happen.

My super handy husband threw this one together with some spray paint and chalkboard paint inspired by the thousands of versions on pinterest and it’s been SO helpful!

how eat real food….really: CSA produce

The idea of eating real food is awesome, but the implementation in every day life with little ones running around, long days and empty cabinets can often be overwhelming. The secret to success is making small changes that you can sustain. Don’t try and change everything at once, but try and change one thing for good. Each change will take you one step closer to a healthier lifestyle!

One change that we made toward this goal was to join a local CSA.
csa
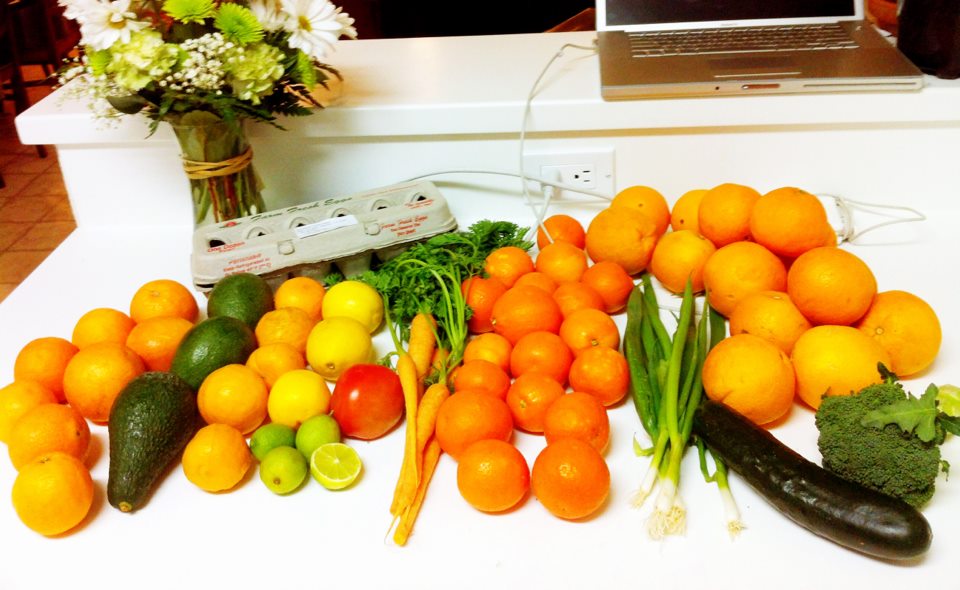
CSA stands for Community Supported Agriculture, and is basically a subscription to a local farm for their produce. Not all CSA farms are organic, but many of them are and you can search for one that is certified organic to be sure you know exactly what you’ll be getting. Each one is set up a bit differently, but for the most part you agree to pay a set fee and get a regular pick-up or delivery of their box of produce!

CSA BENEFITS:

  • You support local organic farming
  • You get whatever they have growing that week which is part of the greatness of it. It will challenge you and your family to eat local organic produce and greatly expand your repertoire of real food. It often opens your eyes to new produce that you would not normally buy and more produce variety = big health benefits!
  • Most CSA’s are a cost savings over buying even non-local, non-organic produce at the grocery store, and a huge cost savings from buying the items individually at a health food store or farmer’s market.
  • Having fresh produce delivered to your door saves many trips to the grocery store!


HOW TO FIND ONE:
If you don’t know how to find a CSA in your area, just ask around at your local farmer’s market, google CSA and your city or visit a site like www.localharvest.org to find more information on CSA programs in your area.

BONUS TIP:
If you live in a subdivision with good neighbor interaction or if you have a channel to communicate news and information with the community, consider starting a CSA program in your neighborhood. Many farms or CSA groups will give a host discount or free produce box to someone who coordinates a neighborhood pick-up that exceeds a certain # of orders. It’s a great community event, and a way to supplement the cost with a little bit of time and effort!

<3 My Vitamix!

We just finished up week 2 with our new Vitamix and I really feel like this thing has revolutionized our meals and taken our nutrition to a whole new level. I know, it’s just an appliance, but I can make things now that I really could not have made before. The amount of fresh produce that we are consuming is outrageous, and my 1 and 2 year old boys are regularly consuming things like kale, spinach, flax and celery….and LOVE it! Ok, I’ll stop before I sound like an infomercial :)

I needed to make this list before I forget to jot down these recipes, so here are some of the things I’ve made just in the past 2 weeks…

  • Kale Green Smoothies
  • Banana Blueberry Smoothies
  • Strawberry Watermelon Smoothies
  • Coconut Kale Smoothies
  • Carrot Spinach Smoothies
  • Mustard Green Smoothies (Ok, so this one was a bad bad idea)
  • Cream of Celery & Spinach Soup
  • Carrot Ginger Soup
  • Mashed Potatoes
  • Pureed Sweet Potatoes
  • Banana Oat Cookies
  • Vegan Cream Sauce
  • Peach Sorbet
  • Frozen Basil Lemonade

PS – these are ALL completely dairy/wheat/egg/nut free. With the exception of chicken stock (which could be substituted with vegetable broth) in the soups, these recipes are all vegan or could easily be made vegan.

So fun. Can’t wait to keep experimenting and better our health at the same time!