Real meal plans week #1

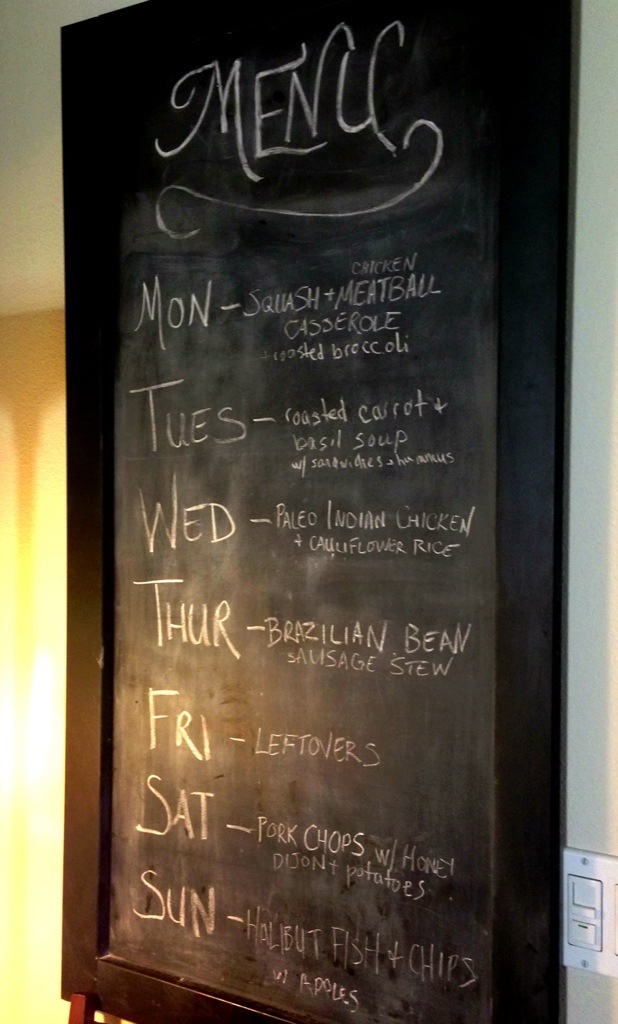
Ok here is this week’s meal planning menu board using real dairy, egg, wheat, nut free food.

Posting in case I need to get these ideas again later, or maybe someone else out there needs ideas too!

20140124-174416.jpg

Here are some of the recipes (though I have modified a few for our family).

MONDAY – http://paleomg.com/summer-squash-meatball-casserole/

TUESDAY – http://www.foodnetwork.com/recipes/jamie-deen/roasted-carrot-and-basil-soup-with-grilled-cheese-dunkers-recipe/index.html

WEDNESDAY – http://paleomg.com/indian-chicken-and-rice-paleo-recipe/

THURSDAY – http://m.allrecipes.com/recipe/71808/brazilian-black-bean-stew

Wild Orange Infused Cream Cheese

I’m loving the fact that so many of the dōTERRA oils can be used not only for their therapeutic and aromatic properties, but also to flavor and completely change up recipes and dishes with just a few tiny drops of oil! In an attempt to use up some ingredients around the holidays, I came up with a cream cheese filling for some french toast and thought…”Wild Orange french toast would have to be delicious” so here it is…..

  • 1 package (8 oz) of cream cheese
  • 3 drops of dōTERRA Wild Orange Essential Oil
  • 3 Tbsp honey (or more if you want it sweeter)
  • 1 tsp vanilla extract

I was adding this to some already cinnamon/brown sugar flavored french toast, but if you are using it alone I’m sure some cinnamon and brown sugar wouldn’t hurt either 🙂 I mixed this into my ‘french toast casserole’, but it would be amazing between 2 pieces for a nice stuffed french toast breakfast with a twist! You could even jazz it up and add a drop of dōTERRA lemon or cinnamon oil for even more intense flavor!!


Cinnamon Cream Pear Tart

What is fall without the smell if cinnamon lifting through the air and sweet homemade treats warm out of the oven?

Here are 2 recipes to enjoy this season. Try this super easy cinnamon cream pear tart – or just whip up a batch of cinnamon cream cheese for amazing flavor on whatever you choose to add it to!

Cinnamon Cream Cheese
2 – 8 oz blocks cream cheese
1/3 cup brown sugar
3 drops cinnamon bark essential oil (measure carefully – this is a strong oil)

Throw all ingredients together and mix until smooth!

Cinnamon Cream Pear Tart
1 can refrigerated crescent rolls
1 batch cinnamon cream cheese
3-4 pears, peeled and sliced
Lemon essential oil spray (optional)
Fresh blackberries (optional)

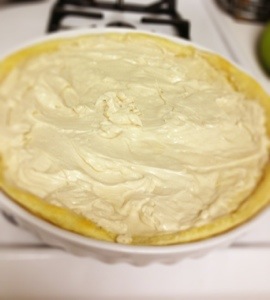
Spread out crescent roll dough in a greased tart pan. Flatten seams together to make one crust lining the pan. Bake at 350 for 8 minutes while preparing the other ingredients.

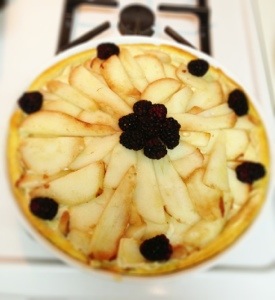
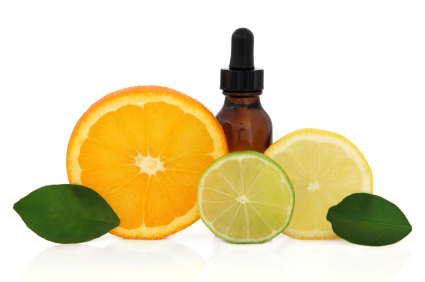
Peel and slice pears and spray with lemon essential oil spray (8 oz water to 15 drops essential oil in a glass spray bottle). When crust has pre-baked, spread a thick layer of cinnamon cream on and top with sliced pears!

20131104-115802.jpg
Bake at 350 for another 10 min until pears are soft and starting to brown on edges. Garnish with fresh blackberries and serve warm or chilled (I like it even better cold)!

20131104-115930.jpg
Save the leftover cinnamon cream to serve on bagels, cracker trays, fruit dip, whatever – this spread alone will be a huge hit at your holiday party!

Melaleuca magic

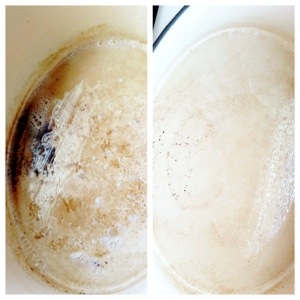
Melaleuca is truly a magical essential oil – great for cleansing and rejuvenating the skin and protecting against environmental threats, but did you know it’s also great for scrubbing off those ‘permanent’ stains on pots and pans!?

Bonus to clean with something so strong yet 100% all natural and safe – no harsh chemicals!

Yay!
Pic on the left was taken after scrubbing with Dawn dish soap.

Pic on the right was taken after scrubbing with a few drops if straight melaleuca essential oil.

20131031-101408.jpg

**These statements have not been evaluated by the Food and Drug Administration. This product is not intended to diagnose, treat, cure, or prevent any disease.

What’s for dinner? …on-the-fly Shepherd’s Pie

I love recipes that I can make up as I go. Maybe it’s because I don’t always have the exact same ingredients on hand or maybe it’s because I don’t like having to follow directions, but if you’re in a bind and have some ground meat on hand, you can make what I like to call “on-the-fly Shepherd’s Pie” 🙂

STEP 1: cook up a pound or two of (preferably local grass-fed…..we ordered 1/4 cow from a local farm, but that is for another post) ground beef in a large oven-safe skillet and boiling some potatoes while your meat is browning. Pre-heat your oven to 400 degrees.

STEP 2: Once the meat browns, this is where the fun begins – dump in a little of this and a little of that to season it up and make a base for your shepherd’s pie. I like to add in things like:

  • some sherry wine
  • chopped organic tomatos
  • chopped onion
  • chopped garlic
  • dash of cinnamon
  • dash of nutmeg (these give ground beef such a yummy unique flavor)
  • sea salt, pepper
  • about a cup of water
  • some organic ketchup to thicken
  • some oregano, basil, thyme

STEP 3: let it all cook a little until it’s nice and saucy, then throw in whatever vegetables you happen to have on hand (you can even use frozen if you so desire). I added a cup or two of chopped carrots & green beans, but seriously you can use a lot of things (green beans, zucchini, etc) Let it all cook more until veggies begin to soften. Taste the sauce and make sure it’s yummy.

STEP 4: At this point you can drain and mash up your potatoes to throw on top, or keep them separated. I kept the potatoes separate and drizzled them with lemon essential oil infused olive oil and fresh rosemary.

STEP 5: I then whipped up a quick batch of gluten-free bisquick dough (ok so this part is a bit cheating if you’re going for 100% ‘real’ food, but if you want you can just mash & use the potatoes) and spooned/spread it right on top of my meat & veggie sauce on the skillet and threw it all in the oven for about 15 minutes until it forms a light and fluffy crust.

This is a super tasty, very forgiving, warm comfort food dish for the changing season! It’s also dairy-free, gluten-free (if you want), nut-free and easily adaptable! I apologize for the lack of pic, but everyone was super hungry 🙂 Will catch it next time!

{DIY} Pumpkin Spice Latte

There are a few ways you can make this delicious fall drink, and I’m still experimenting with different options for those who don’t have these exact ingredients on hand, but the flavor of this is spot on, so I figured I’d go ahead and share it in case any of you, like me, were craving this ‘welcome to fall’ treat!{DIY} pumpkin spice latte recipe

Let me start with a disclaimer that there are 2 ingredients that I feel like really impact the final quality…..

1) the COFFEE – We’re picky when it comes to coffee quality and though we don’t have an espresso maker (which I’m sure would make this more authentic) we use only Illy Brand coffee (aff link) and make it as strong as possible. It’s amazing.
2) the SYRUP – We use Monin brand Vanilla syrup (I get it on S&S from amazon) and it’s a been the big secret to making coffee shop quality lattes at home. (I’ll post my Caramel Macchiato Recipe again soon). I’ve tried other brands and personally don’t like the flavor, so this one is the winner for us.

So anyway…..back to the recipe…..

Pumpkin Spice Mix (as pictured in the shot glass above)
** this makes about 1 cup of mix, so if you like it then go ahead and double it and just store in the fridge for a bigger supply

In a small glass or jar , mix up the following:

  • 3 Tbsp organic pumpkin puree
  • 1 Tbsp ground cinnamon
  • a few sprinkles each of ground ginger, nutmeg and clove
  • 12 pumps of the Monin Vanilla syrup (if you don’t have this you can also make your own simple syrup)
  • 2 Tbsp coconut creamer (or regular, but we use dairy-free)

Mix this little concoction up really well, brew the strongest cup of coffee you can and put about 2 oz of this goodness into it. Stir really well. I like it sweet and tasty, so after adding this mix I still proceeded to add sweetener and more cream as usual to my liking.

Top with fresh whipping cream if you’d like, sprinkle on your cinnamon and enjoy FALL IN A CUP!

**The only reason I’m not 100% satisfied with this recipe is that while drinking, you have to stir often or you’ll end up with some pumpkin mix in the bottom of your cup. I didn’t have any luck straining this because it’s all a thick mix, but I will play around with it more and post updates or would love to hear your feedback too!! I’m also going to try doing a version of the mix using Cinnamon Essential Oil and will post the findings 🙂


Allergen Free Pumpkin Spice Breakfast Cookies

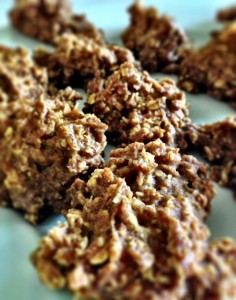
So these look a lot like my 3 ingredient breakfast cookies, but have a flavor all of their own! It has finally dropped below 80 degrees here in Southern California and fall is in the air (at least in my mind) so time to pull out PUMPKIN EVERYTHING! WOOOHOOO!

I decided to try a pumpkin version of the oat cookies and since I am OUT of bananas (big problem in this house) I had to experiment with some other ingredients. Check out these yummy pumpkin spice breakfast cookies. They aren’t overly allergen free pumpkin spice cookiessweet, but my kids didn’t seem to complain (had to snap a quick pic before they were gone) and they were just the pumpkin spice flavor I was craving 🙂

Allergen Free Pumpkin Spice Breakfast Cookies (dairy, wheat, egg, nut free)

  • 2 1/2 cups Rolled Oats (recommend Bob’s Red Mill GF if you need a gluten-free version)
  • 1 cup organic pumpkin puree
  • 1/2 cup apple sauce
  • 2 tsp organic vanilla extract
  • 1 Tbsp cinnamon
  • appx 1/4 tsp each of ground ginger, nutmeg, cloves
  • 3/4 cup organic brown sugar

Throw all ingredients into a stand mixer and mix until a nice blended dough forms. Drop ‘dough’ onto greased cookie sheet and bake at 350 degrees for 10 minutes. Enjoy with a nice hot cup of coffee or a pumpkin spice latte (recipe coming soon)!

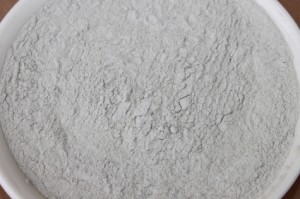
bentonite clay + essential oil ‘facial’

bentonite clay + essential oil facialSo I’ve had a ton of questions about the bentonite clay – what it is and what it does. It’s a really fine all natural grayish colored clay that is super absorbent and full of minerals. A lot of it comes from areas in WY. It’s great at pulling toxins and heavy metals out of your body and in place depositing beneficial minerals. As to not completely re-invent the wheel, Wellness Mama has a great blog post that gives a ton of information on it. I ordered my bentonite clay (affiliate link) on amazon.com and it’s a good mix of calcium bentonite and sodium bentonite so as not to get all of one mineral and none of the other!

As I’ve stated before, I’ve simplified my face cleaning regimen down to 100% all natural honey and oils and I LOVE it. I’m on month 3 of this now and it’s the longest I’ve gone since starting middle school without having some crazy breakouts! I am NOT one of those who was blessed with naturally smooth beautiful skin. at. all. I only wished I’d known about these methods about 20 years ago. I would have saved A LOT OF MONEY and A LOT OF CHEMICALS from going into my body!

So here’s a short 3 step 100% all natural, detox, repairing mini facial!

1) wash your face with 100% raw honey (the more crystallized the better as it nicely exfoliates while you scrub). Just rub the honey on your face and wash with warm water! yum!

2) for the mask, mix the bentonite clay with apple cider vinegar (you can use water if you don’t have ACV, but it is not as smooth or potent). Make sure not to mix it in, or with, anything metal as it will alter the properties of the clay! Make a paste out of it and spread it on your face! Let it dry completely….it will tighten up quite a bit and then rinse off with warm water. Add a drop of 100% CPTG melaleuca (tea tree) essential oil to also help boost the skin cleansing properties.

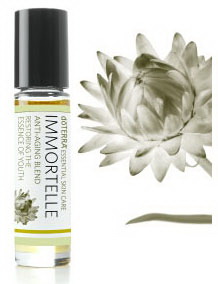
3) moisturize, hydrate and rejuvinate with essential oils! I immediately followed the mask with good hydrating blend of fractionated coconut oil and doTERRA’s Immortelle anti-aging 100% essential oil blend. This stuff is AWESOME! I have been using my own blend of fractionated coconut oils, frankincense and lavender essential oils (which I still love and highly recommend), but if you can at all get your hands on an Immortelle oil blend, it is amazing!Immortelle

Immortelle is doTERRA’s anti-aging blend that contains a powerful mix of some rare oils like frankincense, Hawaiian sandalwood, myrrh, lavender, helichrysum and rose. Send me a message me if you want to get your hands on one of these!

The results = smooth awesome skin that is being pampered, detoxed and cleansed with 100% pure all natural basic ingredients!


how to eat real food…really: GREEN SMOOTHIES!

Anyone that knows me knows that we LOVE our smoothies! We make them every morning and my 2 toddler boys BEG for these. It’s a great way to get a ton of fruits and veggies in right away and start the day right. Of course all our recipes are dairy free so the calories are kept at a minimum too.

My only regret in getting super amazing high powered blender is that I didn’t do it sooner. If there is one purchase we’ve made in the last few years that has contributed the most to our nutrition, the Vitamix wins hands down. Of course you don’t have to have a Vitamix to get healthy amazing blended things quickly, but man, it helps a lot. The best thing for us about it, is that it mixes everything so well you can hide a LOT of veggies in….and still have a delicious smoothie.

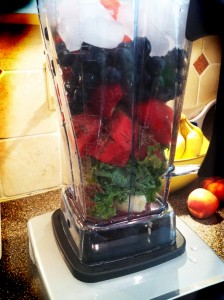
There are endless possibilities and you can throw in whatever you want, but here is our morning go-to smoothie recipe:kale green smoothie recipe

  • 2-3 bananas (not overly ripe b/c I don’t like too much banana flavor)
  • 2-3 stalks of kale (stalks removed – using the leaves only makes it less bitter)
  • 1-2 cups strawberries or 1/2 bag frozen (frozen are great to chill smoothie without watering it down)
  • 2-3 cups baby spinach
  • 1 fresh lemon, juiced (I juice in 1-2 oranges too if I have them)
  • about 2 cups organic rice milk (add more if needed to thin texture)

This is the base no-fail recipe that we love, but it’s also great for throwing in veggies that may need used up like cucumber or carrots! If not using any frozen fruit, add a handful of ice to chill and thicken it up. Despite the photo, I normally avoid blueberries in the smoothies (they love to eat them on the side) as I find they thicken up too much after sitting for a few minutes and are a really big pain in their straw sippy cups.

We also add a drop of Vitamin D to the cups before serving per our amazing pediatrician’s recommendation. It is a vitamin packed way to start the day, and fills them up with the good stuff before anything else!

{DIY} essential oil bath salts

This is SUCH an easy {DIY} project that not only has great therapeutic properties while relaxing and de-stressing your body, but also makes great gifts for friends and family. Keep these salts in mind as the holidays are quickly approaching!
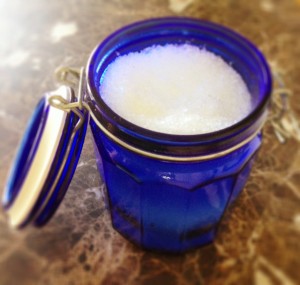
{DIY} bath salts with essential oilsTo make your own bath salts, simply use the following ratio:

  • 1 cup salt
  • 5-10 drops essential oils (depending on how strong you want it)

STEP 1: choose which salt you want to use. The coarser the salt, the slower it will dissolve. Some great options are epsom salts and dead sea salts. I frequently use the epsom salts as they are easy to find, inexpensive, provide a great detox and the magnesium sulfate is great for your health. You can use a combination of salts as well.

STEP 2: Pick the essential oil or blend that you want. There is an endless variety! Here are some of my favorites:
Lavender (relaxation), dōTERRA Balance Blend (grounding), Geranium (skin), Cypress (healthy circulation), dōTERRA Citrus Bliss Blend or any Citrus Oils (invigorating, but still great for night bath), Peppermint (great foot soak), dōTERRA Elevation Blend (smells AMAZING and lifts mood)

STEP 3: Mix the salt and oils together thoroughly until it’s well blended

STEP 4: Pour into glass jar or container for storage. Thrift stores are awesome for this sort of thing! You can get endless varieties of glass bottles with character (dark glass is best for long term storage of any essential oil products). Make a cute tag, tie some twine or ribbon on and you have a unique gift!

Step 5: Fill your bath and throw in several scoops of your scented bath salts! Relax and enjoy!

VARIATIONS:
1) You can drop in a few drops of food coloring (if you don’t care about keeping it ‘all natural’ for a nice color effect. mix it into the salt and stir until thoroughly blended.
2) Add some dried flower petals, herbs or spices for some extra color and texture, though keep in mind they will float in the tub when used!

{DIY} baby onesie makeovers

This week I decided to do something to prepare for this next baby’s arrival since he could show up any time now! Having boy #3 doesn’t leave you with much to shop for, so instead I decided to give some old onesies new life using some fabric scraps I already had (cost = $0). These are really simple and such a fun way to customize some things for a little one! Also a great use of ‘old’ clothes given new life – recycling at it’s finest!

photo(1)These all had previous designs that were a little boring and outdated, so I simply picked some new ones that would cover what was already there. (and NO we haven’t finalized a name for this baby yet, but figured an “E” would be a safe bet) ; )

4 steps to a {DIY} Onesie makeover

  • Print out a template using any clip art silhouettes or font in the size that you want, cut the shape out and trace it onto fabric heat transfer paper (this is the one I use)
  • Iron the transfer paper onto your fabric scrap and cut the shape out
  • Position the shape (heat transfer side down obviously) on your onesie where you want it and iron it in place according to the product instructions.
  • Outline the design with a simple stitch for extra reinforcement and to prevent any peeling and fraying. (this may be optional, but I haven’t tried it without the stitching so not sure how it would hold up through washings?)

This also works GREAT for custom burp cloths, blankets, etc!

Quick tips:: Freshen up your home with essential oils

For a quick pick-me-up around your home, a little essential oil can go a long way! Here are some simple ideas to naturally freshen up the area….and get diffused therapeutic benefits of the oils while you’re at it!freshen your home with essential oils

  • Put a drop of essential oil on the front of your osculating fan and let the scent blow through the area
  • Put a drop into any humidifier to diffuse through the room
  • Drop essential oil into the middle of your toilet paper roll (in the tube). It will absorb into the paper and offer a natural fresh scent to the bathroom!
  • Put some essential oils on a tissue and place in your vacuum bag to freshen and deodorize as you vacuum…or put 5-10 drops in a cup of baking soda and sprinkle around carpets prior to vacuuming!
  • Use any of the {DIY} oil “sprays” you can make as an air freshener – just spritz around the room and enjoy!
  • Add a drop of essential oil to your steam cleaner tank to boost cleaning power and smell great too
  • Put essential oils into your fabric softener spot (see post on {DIY} fabric softener with vinegar and essential oils)
  • Add a drop of your favorite oil to your dishwasher soap to boost cleaning power and smell amazing (lemon and citrus oils are great for the dishes)!
  • Put a drop of essential oils onto a lightbulb to quickly scent a room (great right before guests arrive). The heat will break down the therapeutic properties, but the smell will definitely fill the air!
  • make your own all natural air freshener with essential oil and baking soda that actually fights odors, not masks them!
  • heat a cup of water, drop 2-3 drops of your favorite oil to diffuse into the air (also great trick prior to guests arriving)! dōTERRA’s OnGuard is an amazing spice scent for fall, and it supports healthy immune systems too!


gluten free/dairy free pickup truck birthday cake

My project today was all about BIRTHDAYS! With 2 family birthdays these past few weeks today we celebrated with a gluten free & dairy free pickup truck cake!

truck_bdaycakeI just used a gluten free cake mix for the base and then added in some of our favorite Enjoy Life Chocolate Chips to the batter for more flavor and personality! Followed that with some quick and easy marshmallow fondant, and shaped a truck cake that was supposed to look like daddy’s truck (my husband is re-building his great grandfather’s ’68 GMC). So thankful for all the gluten free resources out there now and that even with food allergies my boys can enjoy some fun birthday cakes!


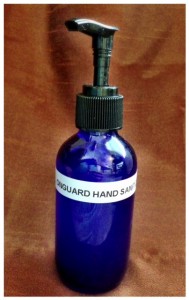
{DIY} hand sanitizer

Making your own hand sanitizer is so simple using 100% dōTERRA essential oils!

diy hand sanitizerMy vote for the best oil to use in hand sanitizer is definitely dōTERRA’s OnGuard Blend. This oil blend has an amazing cinnamon spice smell, and boosts your immune system while protecting against environmental threats.

Here’s the recipe::

  • 1 oz pure aloe vera gel
  • 1 oz purified water
  • 2 oz high-proof vodka, grain alcohol or gin (can use witch hazel extract for an alcohol free version)
  • 12-15 drops dōTERRA OnGuard essential oil blend

You can also add a few capsules of vitamin E oil to the mix to soften skin even further!
Mix all ingredients into a 4 oz glass pump bottle. Shake well to ensure it’s properly blended!

This is a great alternative to commercial hand sanitizers. Here is a typical list of ingredients from a store bought brand:
water, isopropyl alcohol, aloe barbadensis leaf juice, caprylyl glygol, glycerin, isopropyl myristate, tocopheryl acetate, acrylates/C10-30 Alkyl Acreylate Crosspolymer, Aminomethyl Propanol, Frangrance (Parfum), Blue 1 (Cl42090), Yellow 5 (Cl 19140)

Fewer chemicals and additives and much better for your skin! What a bonus to boost immunity while sanitizing your hands!

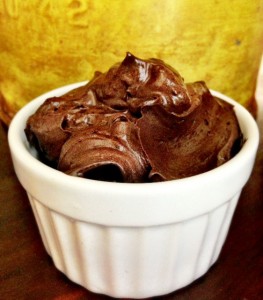
4 ingredient dairy free chocolate mousse

After going dairy-free a few years ago because of our son’s food allergies, chocolate pudding was one thing we definitely cut from our diet that we missed (though it’s a good thing now that I look back at the ingredients)!

I came across this amazing recipe shortly afterwards and our idea of dessert was forever changed! I wish I had come up with this on my own, but give many many thanks to Katie at chocolatecoveredkatie.com for this amazing recipe. I find it tastes much more like a rich chocolate mousse than chocolate frosting. Best thing is that it’s DAIRY FREE and uses nothing but simple real ingredients!

Dairy Free Chocolate MousseHere’s all it takes: (WARNING: you will want to double it so go ahead and prep 2 cans)

  • 1 can coconut milk or cream
  • 1/4 cup 100% cacao powder or cocoa powder (I like to use the dark cacao)
  • 1 tsp pure organic vanilla extract
  • sweetener of your choice to taste

The challenge here is it takes some advanced planning. Open the can of coconut milk, remove the lid and refrigerate for a day (if you can wait that long). You need the cream and the water to separate and the cream to thicken. Carefully remove it from the fridge, pour the cream out into a bowl and save the coconut water to add to your next chicken marinade (coconut is the BEST for marinating chicken)! Add the rest of the ingredients to the cream and mix thoroughly!

If you dump this all in a high speed blender like a Vitamix it literally takes about 3 seconds to be rich and thick. If you want to not waste a single drop getting stuck to the side of a blender, go ahead and whip it up by hand with a fork. 🙂

BONUS TIP (from lots of experience): If you do want to throw this in the vitamix, after scraping out all that you can salvage for your mousse, make a fresh cup of coffee, pour it in, quickly blend with the stuff that’s stuck to the sides of the blender and pour the sweet mocha goodness all back into your cup! enjoy 🙂

On that note, if you make a double batch and happen to have any left, a few spoon fulls in a fresh cup of coffee does make a MEAN rich chocolate mocha…and all DAIRY FREE with the health benefits of coconut!