{DIY} baby onesie makeovers

This week I decided to do something to prepare for this next baby’s arrival since he could show up any time now! Having boy #3 doesn’t leave you with much to shop for, so instead I decided to give some old onesies new life using some fabric scraps I already had (cost = $0). These are really simple and such a fun way to customize some things for a little one! Also a great use of ‘old’ clothes given new life – recycling at it’s finest!

photo(1)
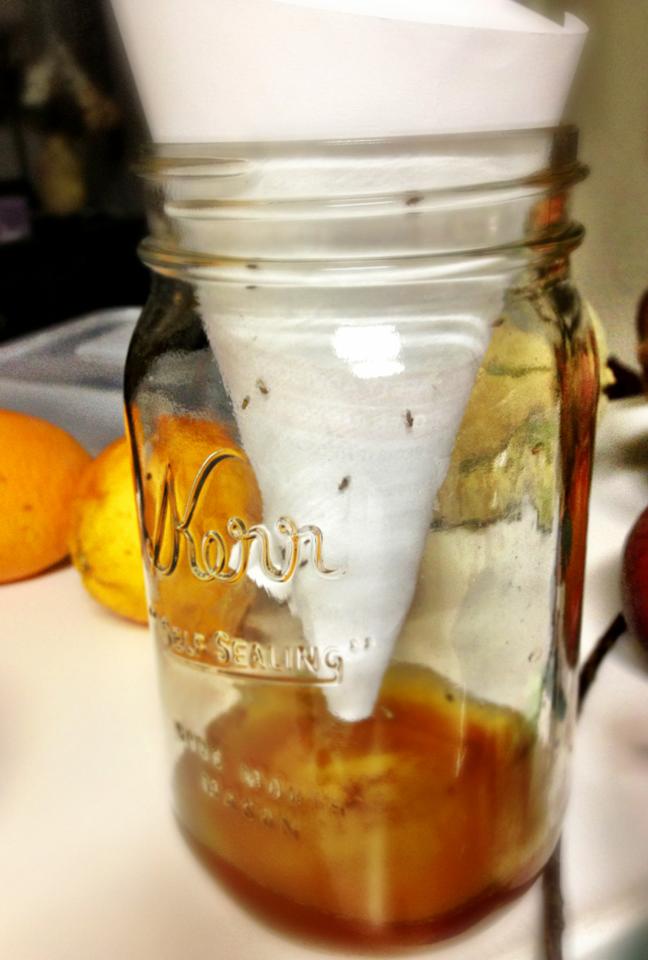
These all had previous designs that were a little boring and outdated, so I simply picked some new ones that would cover what was already there. (and NO we haven’t finalized a name for this baby yet, but figured an “E” would be a safe bet) ; )

4 steps to a {DIY} Onesie makeover

  • Print out a template using any clip art silhouettes or font in the size that you want, cut the shape out and trace it onto fabric heat transfer paper (this is the one I use)
  • Iron the transfer paper onto your fabric scrap and cut the shape out
  • Position the shape (heat transfer side down obviously) on your onesie where you want it and iron it in place according to the product instructions.
  • Outline the design with a simple stitch for extra reinforcement and to prevent any peeling and fraying. (this may be optional, but I haven’t tried it without the stitching so not sure how it would hold up through washings?)

This also works GREAT for custom burp cloths, blankets, etc!

Quick tips:: Freshen up your home with essential oils

For a quick pick-me-up around your home, a little essential oil can go a long way! Here are some simple ideas to naturally freshen up the area….and get diffused therapeutic benefits of the oils while you’re at it!freshen your home with essential oils
  • Put a drop of essential oil on the front of your osculating fan and let the scent blow through the area
  • Put a drop into any humidifier to diffuse through the room
  • Drop essential oil into the middle of your toilet paper roll (in the tube). It will absorb into the paper and offer a natural fresh scent to the bathroom!
  • Put some essential oils on a tissue and place in your vacuum bag to freshen and deodorize as you vacuum…or put 5-10 drops in a cup of baking soda and sprinkle around carpets prior to vacuuming!
  • Use any of the {DIY} oil “sprays” you can make as an air freshener – just spritz around the room and enjoy!
  • Add a drop of essential oil to your steam cleaner tank to boost cleaning power and smell great too
  • Put essential oils into your fabric softener spot (see post on {DIY} fabric softener with vinegar and essential oils)
  • Add a drop of your favorite oil to your dishwasher soap to boost cleaning power and smell amazing (lemon and citrus oils are great for the dishes)!
  • Put a drop of essential oils onto a lightbulb to quickly scent a room (great right before guests arrive). The heat will break down the therapeutic properties, but the smell will definitely fill the air!
  • make your own all natural air freshener with essential oil and baking soda that actually fights odors, not masks them!
  • heat a cup of water, drop 2-3 drops of your favorite oil to diffuse into the air (also great trick prior to guests arriving)! dōTERRA’s OnGuard is an amazing spice scent for fall, and it supports healthy immune systems too!


Simplify: save time & money with home deliveries!

Ok, this has seriously been SUCH a huge help to me since having kids that I cannot say enough about it. One basic way to simplify AND save money is to price out home delivery options for things that you would normally run around town for at the store. For me, I LOVE LOVE LOVE amazon and their subscribe & save program.

I have over 20 things that I don’t have to buy at the store anymore and that I get in bulk shipments and SAVE money on by having them show up at my door. There’s no way that’s not a win-win in my book! Taking 2 (soon to be 3 kids) to the store leaves me less than productive to say the least, plus I don’t have the option to price compare or the room and hands to fill the cart with enough to stock up things.amazon_boxes

This week, I’m not able to get off my feet much (while stalling the arrival of our next precious little one ) and I still have been able to stock up on pantry and household items, thanks to this —>

If you have an amazon prime account you can do their subscribe and save program and if you order more than 5 items at a time, you get 20% off your entire order (when a lot of the items are already cheaper to start with)! If you don’t already have a prime account, you can sign up with Amazon Mom and get a free 3 month trial here.

So here’s how it works…
with Subscribe & Save you pick your item, pick how often you want it auto-shipped (once every month – once every 6 months) and what day of the month you want your shipment. For example, I have an auto-ship for the 3rd of the month so on that date everything I have set for that month will ship. It take some getting used to, but you can easily change the dates and months around once it’s set up.

Here are a few tips and trick that I’ve learned to make sure we’re getting deals (as well as saving time running to stores, gas driving around town, headaches getting my kids to cooperate on extra shopping trips, etc…..)

  • Next time you go shopping, save your receipt and come home and price compare to the amazon price. Make sure to factor in your EXTRA 20% off if you find 5 items. I was shocked at how many things are cheaper online, no tax and no shipping fees! yes, please!
  • Set items to ship only once every 6 months at first so you can learn how long it takes you to use what you’re buying. When you are about to need more, just go and change your shipping month to the next month and it will be on it’s way with the next shipment. After that it’s easy to gauge how often you use up each item.
  • Once you have 5 items shipping in one month, try and spread it out to order 5 different items for the next month to get the 20% discount. This also makes it easier if you think of something you want to add later and still want the bigger discount.

For those wondering what kind of items you would order like this, here is a list of what I get to give you some ideas:

  • diapers x 2
  • wipes
  • paper towels
  • toilet paper
  • flavored syrup for coffee
  • organic coconut milk
  • organic ketchup
  • deli brown mustard
  • organic coconut oil
  • allergen free cereal bars
  • allergen free cookies
  • squeeze applesauce
  • organic vegetable glycerin
  • moisturizing lotion
  • herbal tea bags
  • sunflower nut butter
  • brown rice flour
  • gluten free baking mix
  • organic vanilla extract
  • rolled oats

I swear I don’t work for amazon, but I would if I could b/c I love it SO much! I did sign up to have an affiliate store on my blog for the aforementioned reason, so if you want to see specific brands of what I use, you can browse through there to see a lot of these items. I am just all about saving time and saving money right now to SIMPLIFY our lives and this has been a great way to do it!!


gluten free/dairy free pickup truck birthday cake

My project today was all about BIRTHDAYS! With 2 family birthdays these past few weeks today we celebrated with a gluten free & dairy free pickup truck cake!

truck_bdaycakeI just used a gluten free cake mix for the base and then added in some of our favorite Enjoy Life Chocolate Chips to the batter for more flavor and personality! Followed that with some quick and easy marshmallow fondant, and shaped a truck cake that was supposed to look like daddy’s truck (my husband is re-building his great grandfather’s ’68 GMC). So thankful for all the gluten free resources out there now and that even with food allergies my boys can enjoy some fun birthday cakes!


{DIY} hand sanitizer

Making your own hand sanitizer is so simple using 100% dōTERRA essential oils!

diy hand sanitizerMy vote for the best oil to use in hand sanitizer is definitely dōTERRA’s OnGuard Blend. This oil blend has an amazing cinnamon spice smell, and boosts your immune system while protecting against environmental threats.

Here’s the recipe::

  • 1 oz pure aloe vera gel
  • 1 oz purified water
  • 2 oz high-proof vodka, grain alcohol or gin (can use witch hazel extract for an alcohol free version)
  • 12-15 drops dōTERRA OnGuard essential oil blend

You can also add a few capsules of vitamin E oil to the mix to soften skin even further!
Mix all ingredients into a 4 oz glass pump bottle. Shake well to ensure it’s properly blended!

This is a great alternative to commercial hand sanitizers. Here is a typical list of ingredients from a store bought brand:
water, isopropyl alcohol, aloe barbadensis leaf juice, caprylyl glygol, glycerin, isopropyl myristate, tocopheryl acetate, acrylates/C10-30 Alkyl Acreylate Crosspolymer, Aminomethyl Propanol, Frangrance (Parfum), Blue 1 (Cl42090), Yellow 5 (Cl 19140)

Fewer chemicals and additives and much better for your skin! What a bonus to boost immunity while sanitizing your hands!

4 ingredient dairy free chocolate mousse

After going dairy-free a few years ago because of our son’s food allergies, chocolate pudding was one thing we definitely cut from our diet that we missed (though it’s a good thing now that I look back at the ingredients)!

I came across this amazing recipe shortly afterwards and our idea of dessert was forever changed! I wish I had come up with this on my own, but give many many thanks to Katie at chocolatecoveredkatie.com for this amazing recipe. I find it tastes much more like a rich chocolate mousse than chocolate frosting. Best thing is that it’s DAIRY FREE and uses nothing but simple real ingredients!

Dairy Free Chocolate MousseHere’s all it takes: (WARNING: you will want to double it so go ahead and prep 2 cans)

  • 1 can coconut milk or cream
  • 1/4 cup 100% cacao powder or cocoa powder (I like to use the dark cacao)
  • 1 tsp pure organic vanilla extract
  • sweetener of your choice to taste

The challenge here is it takes some advanced planning. Open the can of coconut milk, remove the lid and refrigerate for a day (if you can wait that long). You need the cream and the water to separate and the cream to thicken. Carefully remove it from the fridge, pour the cream out into a bowl and save the coconut water to add to your next chicken marinade (coconut is the BEST for marinating chicken)! Add the rest of the ingredients to the cream and mix thoroughly!

If you dump this all in a high speed blender like a Vitamix it literally takes about 3 seconds to be rich and thick. If you want to not waste a single drop getting stuck to the side of a blender, go ahead and whip it up by hand with a fork. 🙂

BONUS TIP (from lots of experience): If you do want to throw this in the vitamix, after scraping out all that you can salvage for your mousse, make a fresh cup of coffee, pour it in, quickly blend with the stuff that’s stuck to the sides of the blender and pour the sweet mocha goodness all back into your cup! enjoy 🙂

On that note, if you make a double batch and happen to have any left, a few spoon fulls in a fresh cup of coffee does make a MEAN rich chocolate mocha…and all DAIRY FREE with the health benefits of coconut!

How to eat real food…really:: READ LABELS!

There is SO much that could be discussed when it comes to the topic of reading labels, food labeling and knowing WHAT it is you are actually eating. food labelsI hate to admit that up until a few years ago I rarely glanced at labels when buying food. I knew what I wanted to buy and eat and had been doing the same thing for years, so what was the big deal? Thankfully my son’s severe food allergies rocked our world in a GOOD way when it came to being aware of exactly what we were putting into our bodies…..down the the smallest ingredient.

I was in shock. I had no idea how much ‘stuff’ was in simple things I was buying. It was crap I could not pronounce, had no idea what it was and even worse, didn’t know what damage it was causing our bodies by eating it!

The goal in moving toward real food is cutting out the processed stuff.

Here are just a few tips when it comes to reading labels that you can try and implement to help you become more aware of what you’re buying!

Buy food that doesn’t need labeling! Fresh produce and pastured farm meats are obviously the best choice for your meals. There’s nothing to worry about when nothing has been done to the basic product! I’m not going to pretend like I’m an expert at this. We are often still looking for quick go-to stuff on days I have failed to plan, but even the ‘shelf stuff’ can be purchased wisely and changed to promote healthier eating. Buy local and organic as much as possible. This is by far the #1 change to make in eating clean, real food!

Buy identifiable ingredients! Take a little more time next time you shop and compare products. The first time I went to buy chips after starting to read labels, I realized that the brand I usually reached for had about 25 ingredients. what?!?! What was all that junk?? Picking up an organic option next to it I found 3 ingredients. 3 ingredients that I knew what they were. I felt more confident knowing what I was getting and consuming with the 2nd option and actually tasted better too. Buy items that have only whole, real, identifiable ingredients….things that you know are real. If you can’t pronounce it, best to avoid it!

Know what you want to avoid. Do your research when it comes to which ingredients are harmful to your family’s health and diet. People trying to eat real food are going to want to cut out things such as….

  • high fructose corn syrup
  • artificial sweeteners
  • flavor enhancers (like nitrates)
  • preservatives (like MSG)
  • hydrogenated oils
  • artificial colors and dyes

Learn common ‘hidden ingredients’ especially when health or allergies are involved. Many ingredients are disguised under different terms and may not always jump out as obvious. There is often milk or wheat in items that you would never think would have or need them included!! For example, if you’re avoiding dairy, learn which ingredients are actually dairy beyond the label saying ‘milk’ or ‘cheese.’ For a dairy allergy, you also have to learn that ingredients such as whey, casein, buttermilk, cream, hydrolyzed milk protein, lactose, milk solids, natural butter flavor, etc. are also dairy!
View a complete list of common dairy and dairy ‘hidden ingredients’ here.

Ignore and avoid the “marketing labels” used on packaging. Ignore the verbage such as ‘low fat’, ‘made with real fruit’, ‘100% natural’, ‘multigrain’, ‘no sugar added’, etc. There is very little regulation and most of these mean nothing and a few are clues that there are probably extra chemicals and additives that you really don’t want! Again, make sure you look at the actual ingredients list to know what you are buying!

The best method is not to rush through and throw away everything you have, but to make slow, determined changes every time you go to buy food. Read the label and know that big changes start with the little choices, so start making better choices now!


How to actually get rid of fruit flies

In case anyone is having a problem with fruit flies – if you haven’t tried this it works really well. I put apple cider vinegar (or u can use wine, but who wants to waste that!) a little honey and a squirt of dawn (to break surface tension) in a jar. Sometimes I throw in some fruit scraps. Tape a piece of paper to make a funnel with a small opening at bottom and the fruit flies get in and can’t get out. I’ve had more success with this than anything else!fruitflytrap

3 ingredient breakfast cookies!

We love making these for so many reasons….here are just a few
1) they are delicious
2) my 3 year old can make them
3) my boys LOVE to eat them
4) they satisfy my preggo cravings for something sweet
5) they have 3 basic ingredients!

breakfast cookiesSo here you go….enjoy

Breakfast Cookies


put ingredients in stand mixer and blend until soft sticky ‘dough’ consistency. At this point you can also throw in some mini chocolate chips, coconut flakes, craisins, whatever you feel like. We like to sprinkle in Enjoy Life Allergen Free Mini-Chocolate Chips.

Drop by spoon-full on greased cookie sheet and bake at 350 for about 10-12 minutes!

Allergy Friendly Chicken Satays with Peanut-Free Sauce

This is one of my all time favorite recipes, something we created after spending our honeymoon in Thailand.  We could NOT get enough of their food!  This is an extremely mild American-ized version of a classic Thai satay.  Enjoy!

peanut free peanut sauceThai Chicken Satays with Sunbutter (or Peanut) Sauce

  • 20  chicken tenderloins
  • 20  bamboo skewers (optional)

Marinade

  • 1 can coconut milk
  • gluten free teriyaki sauce  (appx 1/4 – 1/2 cup?) (see my amazon store for where to buy)
  • honey  (appx 2 Tbsp)
  • 2 cloves garlic
  • steak seasonings or your fav seasoning mix  (sprinkle it over marinade)
  • lime juice  (appx 2 Tbsp)

mix all marinade ingredients.  Pour over chicken tenderloins in a sealed container or ziplock bag and marinate at least 4-6 hours (preferably overnight).

at least 1 hour prior to cooking, soak bamboo skewers in water to prevent scorching on grill

The most amazing peanut sauce in the world. Due to my son’s severe peanut allergy we now make this with Sunbutter vs. Peanut butter to make it allergy friendly

  • 1/3 – 1/2 cup Sunbutter (if no allergy, use fresh ground honey roasted peanut butter)
  • 1/4 cup chicken broth (I like to add this at the end so I can thin it only as much as it needs)
  • 2 Tbsp dijon or spicy brown mustard
  • 1 Tbsp. gluten free teriyaki sauce
  • 2-4 Tbsp. honey (to desired sweetness)
  • a few drops of hot sauce or chili pepper sauce (as desired)
  • 1/2 tsp. fresh ground ginger
  • 2 cloves garlic
  • 1 tbsp. lime juice

before cooking chicken, make sauce
mix natural peanut or sunflower nut butter, chicken stock, teriyaki sauce, dijon mustard, honey, chili sauce, garlic, ginger and lime juice together in mini food processer until creamy.  Adjust thickness with chicken stock and heat with chili sauce as desired.
Store in refrigerator until ready to serve.

————————-

Skewer each tenderloin and grill to desired doneness, brushing with reserved marinade to keep moist while cooking. TIP: arrange chicken skewers so that the ‘handle’ rests on top of the tenderloin next to it on the grill to further prevent them from scorching. Can also grill chicken directly without skewering.  Serve with peanut sauce and jasmine rice! For entertaining, it’s also great with an appetizer of home made mango salsa. Delicious both hot or cold!

Quick Tip:: {DIY} natural fabric softener

This is so simple it shouldn’t be called {DIY}, but if you’re still buying commercial fabric softener you can stop now!

Jlavender fabric softenerust fill the liquid fabric softener spot on your washer with white vinegar, and add 2-3 drops of your favorite essential oil. I love lavender EO to freshen the laundry. Not only does this soften your clothes, but the scent of real lavender fills your house while washing, which also greatly helps to reduce the stress of laundry day 🙂

Even more importantly, it keeps this list of chemicals out of your fabric and off of your skin:
(ingredients in Liquid Ultra Downy Spring Lavender Scent, taken directly from Proctor & Gamble. view pdf here)

  • diethyl ester dimethyl ammonium chloride,
  • Fragrance (synthetic)
  • Starch
  • Ammonium chloride
  • Calcium chloride
  • Formic acid
  • Polydimethylsiloxane
  • Liquitint colorant Purple
  • Benzisothiazolinone
  • diethylenetriamine pentaacetate

Another great way to save money, reduce chemicals and avoid unnecessary irritants and allergens in your home!

How to eat real food…really: MEAL PLANNING!

So this idea is rather basic, but makes or breaks my success every week without fail. If I fail to plan, our meals are such a struggle and it’s tempting to throw something less than healthy on the table to get it done fast! I’ve learned (ok, am STILL learning) the hard way that there is much less work and stress involved with planning ahead and the meals are much better, healthier and balanced! Eating real food is not hard when you know ahead of time what you’re going to do!

meal planning menu boardI’ve tried everything out there to get myself organized in this fashion, but without fail, our trusty menu board is the easiest and best way to make it happen.

My super handy husband threw this one together with some spray paint and chalkboard paint inspired by the thousands of versions on pinterest and it’s been SO helpful!

Quick Tip:: Uses for lemon spray

I can’t say enough how crazy useful my essential oil sprays are. Filtered water + 100% CPTG Essential Oils = NATURAL MULTI-USE PRODUCT! lemon sprayMy lemon oil spray is always out on my kitchen counter to clean counters, shine my sink and faucet, polish my dining room table and spritz in the air to freshen the room, but is also great to keep fresh fruit… fresh! No more saturating the fruit in lemon juice – just spray your cut fruit with this lemon spray and it coats evenly with just the right strength!

In case you missed the {DIY} recipe for these sprays, it’s simple:

  • 8 oz filtered water
  • about 15 drops doTERRA lemon essential oil

Shake and spray! I have sprays of Wild Orange EO, OnGuard EO, Lavender EO and Lemon EO just sitting in my kitchen alone!

**These statements have not been evaluated by the Food and Drug Administration. This product is not intended to diagnose, treat, cure, or prevent any disease.

{DIY} natural bum paste!

The {DIY} project today…home made diaper cream! This {DIY} has been a huge success and I can honestly say I will not be buying diaper cream from the store ever again! It works great, smells great and mostly importantly is SAFE to use on my little ones. You will be happy to know exactly what is in your cream, especially when your 2 year old decides to open it up and rub it all over himself (that may or may not have happened here yesterday) 🙂diaper rash cream

This stuff is so easy to make, and my 3 year old loved helping.
Recipe adapted from www.mymerrymessylife.com

What’s in it:

  • 1/2 c raw organic Shea butter
  • 1/4 c raw organic coconut oil
  • 1 Tbsp organic beeswax pastilles
  • 2 Tbsp zinc oxide powder (can omit if using cloth diapers)
  • 1 Tbsp pure aloe vera gel
  • 10 drops lavender essential oil
  • 8 drops melaleuca essential oil
  • 4 drops peppermint essential oil

STEP 1:
heat the shea butter, coconut oil and beeswax in double boiler over med heat until liquified. Remove from heat and let cool slightly (just so the temp is lower).
STEP 2:
Pour into stand mixer and add zinc powder, aloe and whip on high until smooth and completely blended. Drop in essential oils (make sure the mix is no longer hot as heat can break down the therapeutic properties of the oils).
STEP 3:
Mix thoroughly and pour into containers. Glass containers are best as the essential oils can break down plastic over time. Makes appx 8 oz of cream so I divided into two 4 oz glass jars. It will be thin when you pour it, but will thicken up quickly as it cools, so don’t plan on moving it to different containers after cooling 🙂 I keep a small one in the diaper bag, and at each changing station throughout the house!

The oils are are moisturizing and calming and soothing to baby’s skin. The zinc provides an excellent wetness barrier. The combination of ingredients is perfect for the little bums, and you may want to rub it on your arms and hands while you’re at it 🙂 If you like the recipe, I’d suggest doubling it next time and stocking up!

days like today need BALANCE!

dōTERRA’s Balance Grounding Blend was created for days like I have had today 🙂 I’m pretty sure the theme of the day is ….”If it can go wrong, it will go wrong” 15ml_balanceWe all have these days, but instead of keeping emotions high or overindulging in chocolate and wine, dōTERRA has an awesome blend of oils called Balance.

A blend of Blue Tansy, Frankincense, Rosewood, Spruce, these oils combine to lower stress levels, calm anxious feelings and promote relaxation and grounding!

Diffusing is one of our favorite ways to enjoy Balance grounding blend, but topical application with massage to the feet, neck and back can be effective. Balance is also great for relaxing the kiddos after a busy day at school. Just dilute a drop into some coconut oil and rub on their shoulders or feet.

**These statements have not been evaluated by the Food and Drug Administration. This product is not intended to diagnose, treat, cure, or prevent any disease.