Wild Orange Infused Cream Cheese

I’m loving the fact that so many of the dōTERRA oils can be used not only for their therapeutic and aromatic properties, but also to flavor and completely change up recipes and dishes with just a few tiny drops of oil! In an attempt to use up some ingredients around the holidays, I came up with a cream cheese filling for some french toast and thought…”Wild Orange french toast would have to be delicious” so here it is…..

  • 1 package (8 oz) of cream cheese
  • 3 drops of dōTERRA Wild Orange Essential Oil
  • 3 Tbsp honey (or more if you want it sweeter)
  • 1 tsp vanilla extract

I was adding this to some already cinnamon/brown sugar flavored french toast, but if you are using it alone I’m sure some cinnamon and brown sugar wouldn’t hurt either 🙂 I mixed this into my ‘french toast casserole’, but it would be amazing between 2 pieces for a nice stuffed french toast breakfast with a twist! You could even jazz it up and add a drop of dōTERRA lemon or cinnamon oil for even more intense flavor!!


Cinnamon Cream Pear Tart

What is fall without the smell if cinnamon lifting through the air and sweet homemade treats warm out of the oven?

Here are 2 recipes to enjoy this season. Try this super easy cinnamon cream pear tart – or just whip up a batch of cinnamon cream cheese for amazing flavor on whatever you choose to add it to!

Cinnamon Cream Cheese
2 – 8 oz blocks cream cheese
1/3 cup brown sugar
3 drops cinnamon bark essential oil (measure carefully – this is a strong oil)

Throw all ingredients together and mix until smooth!

Cinnamon Cream Pear Tart
1 can refrigerated crescent rolls
1 batch cinnamon cream cheese
3-4 pears, peeled and sliced
Lemon essential oil spray (optional)
Fresh blackberries (optional)

Spread out crescent roll dough in a greased tart pan. Flatten seams together to make one crust lining the pan. Bake at 350 for 8 minutes while preparing the other ingredients.

Peel and slice pears and spray with lemon essential oil spray (8 oz water to 15 drops essential oil in a glass spray bottle). When crust has pre-baked, spread a thick layer of cinnamon cream on and top with sliced pears!

20131104-115802.jpg
Bake at 350 for another 10 min until pears are soft and starting to brown on edges. Garnish with fresh blackberries and serve warm or chilled (I like it even better cold)!

20131104-115930.jpg
Save the leftover cinnamon cream to serve on bagels, cracker trays, fruit dip, whatever – this spread alone will be a huge hit at your holiday party!

What’s for dinner? …on-the-fly Shepherd’s Pie

I love recipes that I can make up as I go. Maybe it’s because I don’t always have the exact same ingredients on hand or maybe it’s because I don’t like having to follow directions, but if you’re in a bind and have some ground meat on hand, you can make what I like to call “on-the-fly Shepherd’s Pie” 🙂

STEP 1: cook up a pound or two of (preferably local grass-fed…..we ordered 1/4 cow from a local farm, but that is for another post) ground beef in a large oven-safe skillet and boiling some potatoes while your meat is browning. Pre-heat your oven to 400 degrees.

STEP 2: Once the meat browns, this is where the fun begins – dump in a little of this and a little of that to season it up and make a base for your shepherd’s pie. I like to add in things like:

  • some sherry wine
  • chopped organic tomatos
  • chopped onion
  • chopped garlic
  • dash of cinnamon
  • dash of nutmeg (these give ground beef such a yummy unique flavor)
  • sea salt, pepper
  • about a cup of water
  • some organic ketchup to thicken
  • some oregano, basil, thyme

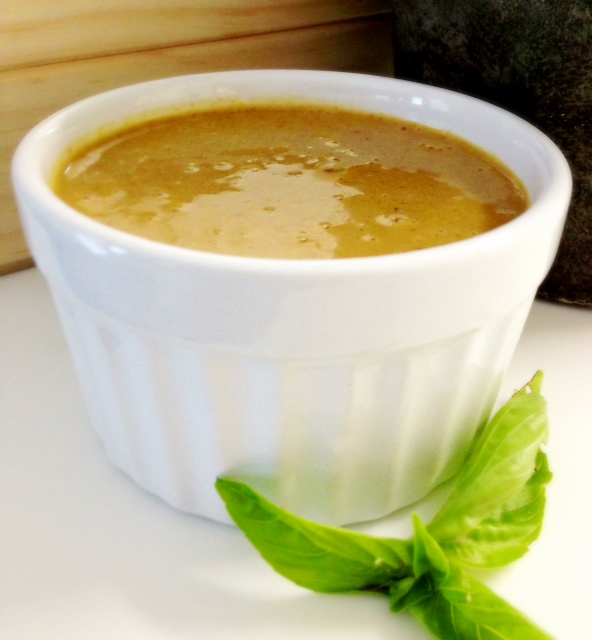
STEP 3: let it all cook a little until it’s nice and saucy, then throw in whatever vegetables you happen to have on hand (you can even use frozen if you so desire). I added a cup or two of chopped carrots & green beans, but seriously you can use a lot of things (green beans, zucchini, etc) Let it all cook more until veggies begin to soften. Taste the sauce and make sure it’s yummy.

STEP 4: At this point you can drain and mash up your potatoes to throw on top, or keep them separated. I kept the potatoes separate and drizzled them with lemon essential oil infused olive oil and fresh rosemary.

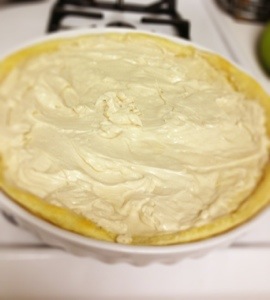
STEP 5: I then whipped up a quick batch of gluten-free bisquick dough (ok so this part is a bit cheating if you’re going for 100% ‘real’ food, but if you want you can just mash & use the potatoes) and spooned/spread it right on top of my meat & veggie sauce on the skillet and threw it all in the oven for about 15 minutes until it forms a light and fluffy crust.

This is a super tasty, very forgiving, warm comfort food dish for the changing season! It’s also dairy-free, gluten-free (if you want), nut-free and easily adaptable! I apologize for the lack of pic, but everyone was super hungry 🙂 Will catch it next time!

{DIY} Pumpkin Spice Latte

There are a few ways you can make this delicious fall drink, and I’m still experimenting with different options for those who don’t have these exact ingredients on hand, but the flavor of this is spot on, so I figured I’d go ahead and share it in case any of you, like me, were craving this ‘welcome to fall’ treat!{DIY} pumpkin spice latte recipe

Let me start with a disclaimer that there are 2 ingredients that I feel like really impact the final quality…..

1) the COFFEE – We’re picky when it comes to coffee quality and though we don’t have an espresso maker (which I’m sure would make this more authentic) we use only Illy Brand coffee (aff link) and make it as strong as possible. It’s amazing.
2) the SYRUP – We use Monin brand Vanilla syrup (I get it on S&S from amazon) and it’s a been the big secret to making coffee shop quality lattes at home. (I’ll post my Caramel Macchiato Recipe again soon). I’ve tried other brands and personally don’t like the flavor, so this one is the winner for us.

So anyway…..back to the recipe…..

Pumpkin Spice Mix (as pictured in the shot glass above)
** this makes about 1 cup of mix, so if you like it then go ahead and double it and just store in the fridge for a bigger supply

In a small glass or jar , mix up the following:

  • 3 Tbsp organic pumpkin puree
  • 1 Tbsp ground cinnamon
  • a few sprinkles each of ground ginger, nutmeg and clove
  • 12 pumps of the Monin Vanilla syrup (if you don’t have this you can also make your own simple syrup)
  • 2 Tbsp coconut creamer (or regular, but we use dairy-free)

Mix this little concoction up really well, brew the strongest cup of coffee you can and put about 2 oz of this goodness into it. Stir really well. I like it sweet and tasty, so after adding this mix I still proceeded to add sweetener and more cream as usual to my liking.

Top with fresh whipping cream if you’d like, sprinkle on your cinnamon and enjoy FALL IN A CUP!

**The only reason I’m not 100% satisfied with this recipe is that while drinking, you have to stir often or you’ll end up with some pumpkin mix in the bottom of your cup. I didn’t have any luck straining this because it’s all a thick mix, but I will play around with it more and post updates or would love to hear your feedback too!! I’m also going to try doing a version of the mix using Cinnamon Essential Oil and will post the findings 🙂


Allergen Free Pumpkin Spice Breakfast Cookies

So these look a lot like my 3 ingredient breakfast cookies, but have a flavor all of their own! It has finally dropped below 80 degrees here in Southern California and fall is in the air (at least in my mind) so time to pull out PUMPKIN EVERYTHING! WOOOHOOO!

I decided to try a pumpkin version of the oat cookies and since I am OUT of bananas (big problem in this house) I had to experiment with some other ingredients. Check out these yummy pumpkin spice breakfast cookies. They aren’t overly allergen free pumpkin spice cookiessweet, but my kids didn’t seem to complain (had to snap a quick pic before they were gone) and they were just the pumpkin spice flavor I was craving 🙂

Allergen Free Pumpkin Spice Breakfast Cookies (dairy, wheat, egg, nut free)

  • 2 1/2 cups Rolled Oats (recommend Bob’s Red Mill GF if you need a gluten-free version)
  • 1 cup organic pumpkin puree
  • 1/2 cup apple sauce
  • 2 tsp organic vanilla extract
  • 1 Tbsp cinnamon
  • appx 1/4 tsp each of ground ginger, nutmeg, cloves
  • 3/4 cup organic brown sugar

Throw all ingredients into a stand mixer and mix until a nice blended dough forms. Drop ‘dough’ onto greased cookie sheet and bake at 350 degrees for 10 minutes. Enjoy with a nice hot cup of coffee or a pumpkin spice latte (recipe coming soon)!

4 ingredient dairy free chocolate mousse

After going dairy-free a few years ago because of our son’s food allergies, chocolate pudding was one thing we definitely cut from our diet that we missed (though it’s a good thing now that I look back at the ingredients)!

I came across this amazing recipe shortly afterwards and our idea of dessert was forever changed! I wish I had come up with this on my own, but give many many thanks to Katie at chocolatecoveredkatie.com for this amazing recipe. I find it tastes much more like a rich chocolate mousse than chocolate frosting. Best thing is that it’s DAIRY FREE and uses nothing but simple real ingredients!

Dairy Free Chocolate MousseHere’s all it takes: (WARNING: you will want to double it so go ahead and prep 2 cans)

  • 1 can coconut milk or cream
  • 1/4 cup 100% cacao powder or cocoa powder (I like to use the dark cacao)
  • 1 tsp pure organic vanilla extract
  • sweetener of your choice to taste

The challenge here is it takes some advanced planning. Open the can of coconut milk, remove the lid and refrigerate for a day (if you can wait that long). You need the cream and the water to separate and the cream to thicken. Carefully remove it from the fridge, pour the cream out into a bowl and save the coconut water to add to your next chicken marinade (coconut is the BEST for marinating chicken)! Add the rest of the ingredients to the cream and mix thoroughly!

If you dump this all in a high speed blender like a Vitamix it literally takes about 3 seconds to be rich and thick. If you want to not waste a single drop getting stuck to the side of a blender, go ahead and whip it up by hand with a fork. 🙂

BONUS TIP (from lots of experience): If you do want to throw this in the vitamix, after scraping out all that you can salvage for your mousse, make a fresh cup of coffee, pour it in, quickly blend with the stuff that’s stuck to the sides of the blender and pour the sweet mocha goodness all back into your cup! enjoy 🙂

On that note, if you make a double batch and happen to have any left, a few spoon fulls in a fresh cup of coffee does make a MEAN rich chocolate mocha…and all DAIRY FREE with the health benefits of coconut!

3 ingredient breakfast cookies!

We love making these for so many reasons….here are just a few
1) they are delicious
2) my 3 year old can make them
3) my boys LOVE to eat them
4) they satisfy my preggo cravings for something sweet
5) they have 3 basic ingredients!

breakfast cookiesSo here you go….enjoy

Breakfast Cookies


put ingredients in stand mixer and blend until soft sticky ‘dough’ consistency. At this point you can also throw in some mini chocolate chips, coconut flakes, craisins, whatever you feel like. We like to sprinkle in Enjoy Life Allergen Free Mini-Chocolate Chips.

Drop by spoon-full on greased cookie sheet and bake at 350 for about 10-12 minutes!

Allergy Friendly Chicken Satays with Peanut-Free Sauce

This is one of my all time favorite recipes, something we created after spending our honeymoon in Thailand.  We could NOT get enough of their food!  This is an extremely mild American-ized version of a classic Thai satay.  Enjoy!

peanut free peanut sauceThai Chicken Satays with Sunbutter (or Peanut) Sauce

  • 20  chicken tenderloins
  • 20  bamboo skewers (optional)

Marinade

  • 1 can coconut milk
  • gluten free teriyaki sauce  (appx 1/4 – 1/2 cup?) (see my amazon store for where to buy)
  • honey  (appx 2 Tbsp)
  • 2 cloves garlic
  • steak seasonings or your fav seasoning mix  (sprinkle it over marinade)
  • lime juice  (appx 2 Tbsp)

mix all marinade ingredients.  Pour over chicken tenderloins in a sealed container or ziplock bag and marinate at least 4-6 hours (preferably overnight).

at least 1 hour prior to cooking, soak bamboo skewers in water to prevent scorching on grill

The most amazing peanut sauce in the world. Due to my son’s severe peanut allergy we now make this with Sunbutter vs. Peanut butter to make it allergy friendly

  • 1/3 – 1/2 cup Sunbutter (if no allergy, use fresh ground honey roasted peanut butter)
  • 1/4 cup chicken broth (I like to add this at the end so I can thin it only as much as it needs)
  • 2 Tbsp dijon or spicy brown mustard
  • 1 Tbsp. gluten free teriyaki sauce
  • 2-4 Tbsp. honey (to desired sweetness)
  • a few drops of hot sauce or chili pepper sauce (as desired)
  • 1/2 tsp. fresh ground ginger
  • 2 cloves garlic
  • 1 tbsp. lime juice

before cooking chicken, make sauce
mix natural peanut or sunflower nut butter, chicken stock, teriyaki sauce, dijon mustard, honey, chili sauce, garlic, ginger and lime juice together in mini food processer until creamy.  Adjust thickness with chicken stock and heat with chili sauce as desired.
Store in refrigerator until ready to serve.

————————-

Skewer each tenderloin and grill to desired doneness, brushing with reserved marinade to keep moist while cooking. TIP: arrange chicken skewers so that the ‘handle’ rests on top of the tenderloin next to it on the grill to further prevent them from scorching. Can also grill chicken directly without skewering.  Serve with peanut sauce and jasmine rice! For entertaining, it’s also great with an appetizer of home made mango salsa. Delicious both hot or cold!

How to eat real food…really: MEAL PLANNING!

So this idea is rather basic, but makes or breaks my success every week without fail. If I fail to plan, our meals are such a struggle and it’s tempting to throw something less than healthy on the table to get it done fast! I’ve learned (ok, am STILL learning) the hard way that there is much less work and stress involved with planning ahead and the meals are much better, healthier and balanced! Eating real food is not hard when you know ahead of time what you’re going to do!

meal planning menu boardI’ve tried everything out there to get myself organized in this fashion, but without fail, our trusty menu board is the easiest and best way to make it happen.

My super handy husband threw this one together with some spray paint and chalkboard paint inspired by the thousands of versions on pinterest and it’s been SO helpful!

Dairy Free Chocolate ‘Milkshakes’ for Breakfast!

My little one is 2 today, and the birthday boy is so excited about chocolate ‘milkshakes’ for breakfast! When you’re special treat is sweetened with bananas and sunbutter while hiding kale and vitamin D, you can feel good about saying ‘YES’ to chocolate milkshakes!

photo(6)INGREDIENTS:

  • 3 large bananas
  • appx 1/2 cup Sunbutter
  • 1 tsp Organic Vanilla Extract
  • a handful of ice cubes
  • 2-3 Tbsp 100% cacao powder
  • leaves from 1-2 stalks of kale (stems removed) and/or 1-2 cups spinach leaves
  • 1/2 an avocado if you want to add in more good fat and make it creamier
  • 2 cups organic rice milk (or more depending on desired thickness)

Mix the following in a Vitamix or other high speed blender, pour into cups and enjoy! (per our pediatrician’s recommendation, I also add 1-2 drops of Carlson Vitamin D drops (2,000 IU) to each of our cups before drinking, and often add in 1 Tbsp of DHA/EPA Omega 3 fish oil for kids (message me if you want to know where to get this). The boys LOVE this dairy free, nut free treat and hopefully you will too!

Lavender Whipped Cream

Use # 1,234,000 for 100% pure lavender oil:

tonight’s dessert was homemade (gluten free) strawberry shortcake topped with fresh berries, peaches and… lavender whipped cream! Such a great gourmet flavor that really took it to another level! Try this on your favorite dessert next time to really impress your guests!

Lavender Whipped Cream:

  • 1 pint heavy cream
  • a few Tbsp of sugar (to your taste)
  • about 2 drops of pure lavender essential oil

blend on high speed until the cream is thick and forms peaks

PS – the lavender whipped cream along with vanilla syrup also made some amazing coffee!

Essential Oil Infused Olive Oils!

lemon_oliveA whole new way to use 100% CPTG essential oils – made some really tasty lemon infused olive oil tonight! Oh the possibilities are endless with flavored olive oils in the kitchen!

To make: add about 20 drops of 100% CPTG essential oil (make sure that it is an oil safe for internal consumption – we only use dōTERRA) to about 8 oz of olive oil.

Our most used infused oils are

  • lemon
  • wild orange
  • rosemary & thyme (I combine these two for an AMAZING herb flavor that makes any dish stand out. Just do 8-10 drops each of rosemary and thyme in the 8 oz of olive oil)

Some of my favorite ways to use these diffused olive oils:

  • over baked chicken or fish just prior to serving
  • drizzled over fresh popcorn and top with sea salt (Rosemary&Thyme, OnGuard, Lemon)
  • mixed into a batch of brown rice or quinoa after cooking for an instant custom side dish
  • on a plate with a splash of balsamic for dipping fresh bread
  • over salad as a fresh and light dressing (wild orange is amazing for salad dressing)
  • coat steamed or grilled veggies for fantastic flavor
  • mixed into homemade soups for an amazing boost in taste (rosemary&thyme oil goes into all our homemade chicken noodle and broth based soups)

Essential oil infused olive oils are best used at the end of the cooking process just prior to serving, as heat will break down some of the therapeutic properties of the oils.

TIP: Save old wine bottles or glass containers from purchased products to convert into olive oil dispensers! I purchased a set of 6 Chrome Bottle Pourers from amazon.com and have used them on my salvaged containers!

Paleo Almond Crusted Pork Loin and Cranberry Chutney

Before my son came along and we were forced to eat according to food allergies, my husband and I tried to eat Paleo in an effort to reduce our intake of processed foods and refined sugars and improve our health and lifestyle. While it can be a big lifestyle change and a huge challenge, it’s great to stretch out of the box, find new family favorites and use REAL FOOD!

Here is one of the recipes that we love, though we’ve had to cut since due to severe nut allergies. Please forgive the vague measurements but I was ‘improvising’ as I went. The spiced Chutney makes a wonderful flavor for the holiday season!

Almond Crusted Pork Loin

  • 1 package of thin cut boneless pork loin chops (much thinner than regular pork chops)
  • 2 eggs
  • 1/4 c. coconut milk
  • 1 Tbsp honey
  • about 1 cup whole raw almonds
  • thyme, rosemary, black pepper, parsley

combine beaten egg, coconut milk and honey in a shallow pan
grind almonds in mini food processor until finely chopped, add spices to almond mixture/
sea salt and pepper the pork loin if desired
dip pork loin in egg wash, then coat in almond mixture

place coated pork loin on greased foil lined baking sheet and bake at 450 for appx 15-20 min (cooking time may vary so do not overcook)

Cranberry Apple Chutney

  • 1/2 cup dried cranberries
  • 1 granny smith apple, cored and finely chopped
  • white cooking wine
  • white vinegar
  • balsamic vinegar
  • ground ginger, allspice, cinnamon, cloves

while pork is cooking, heat about 1 cup water in saucepan and bring to low boil
add cranberries and apples and cook until tender
while cooking, add some (appx 2 Tbsp each) white wine, white vinegar & balsamic vinegar along with a dash of all the spices
when apples are tender, pour mix into food processor and blend to desired consistency
spoon chutney onto almond crusted pork loin and serve

I served this dish with olive oil roasted asparagus.  Let me know if you try it and love it as much as we did!