UPLEVELING the Meal Planning

Link

Life has a good way of reminding us that we are never in control. This year has brought on new challenges that we never thought we’d be dealing with. When faced with an unexpected health challenger or diagnosis there are 2 choices: fight and do what you can to help your body heal, or give up and resign to let it eventually beat you down. I wholeheartedly believe that food is medicine, so when we found out this year that my husband’s twenty year career as a Marine left him with some long term traumatic brain injuries that are just now starting to present, a “no brainer” move has been to tweak our diets to give him the best possible nutrition to boost brain health and regeneration.

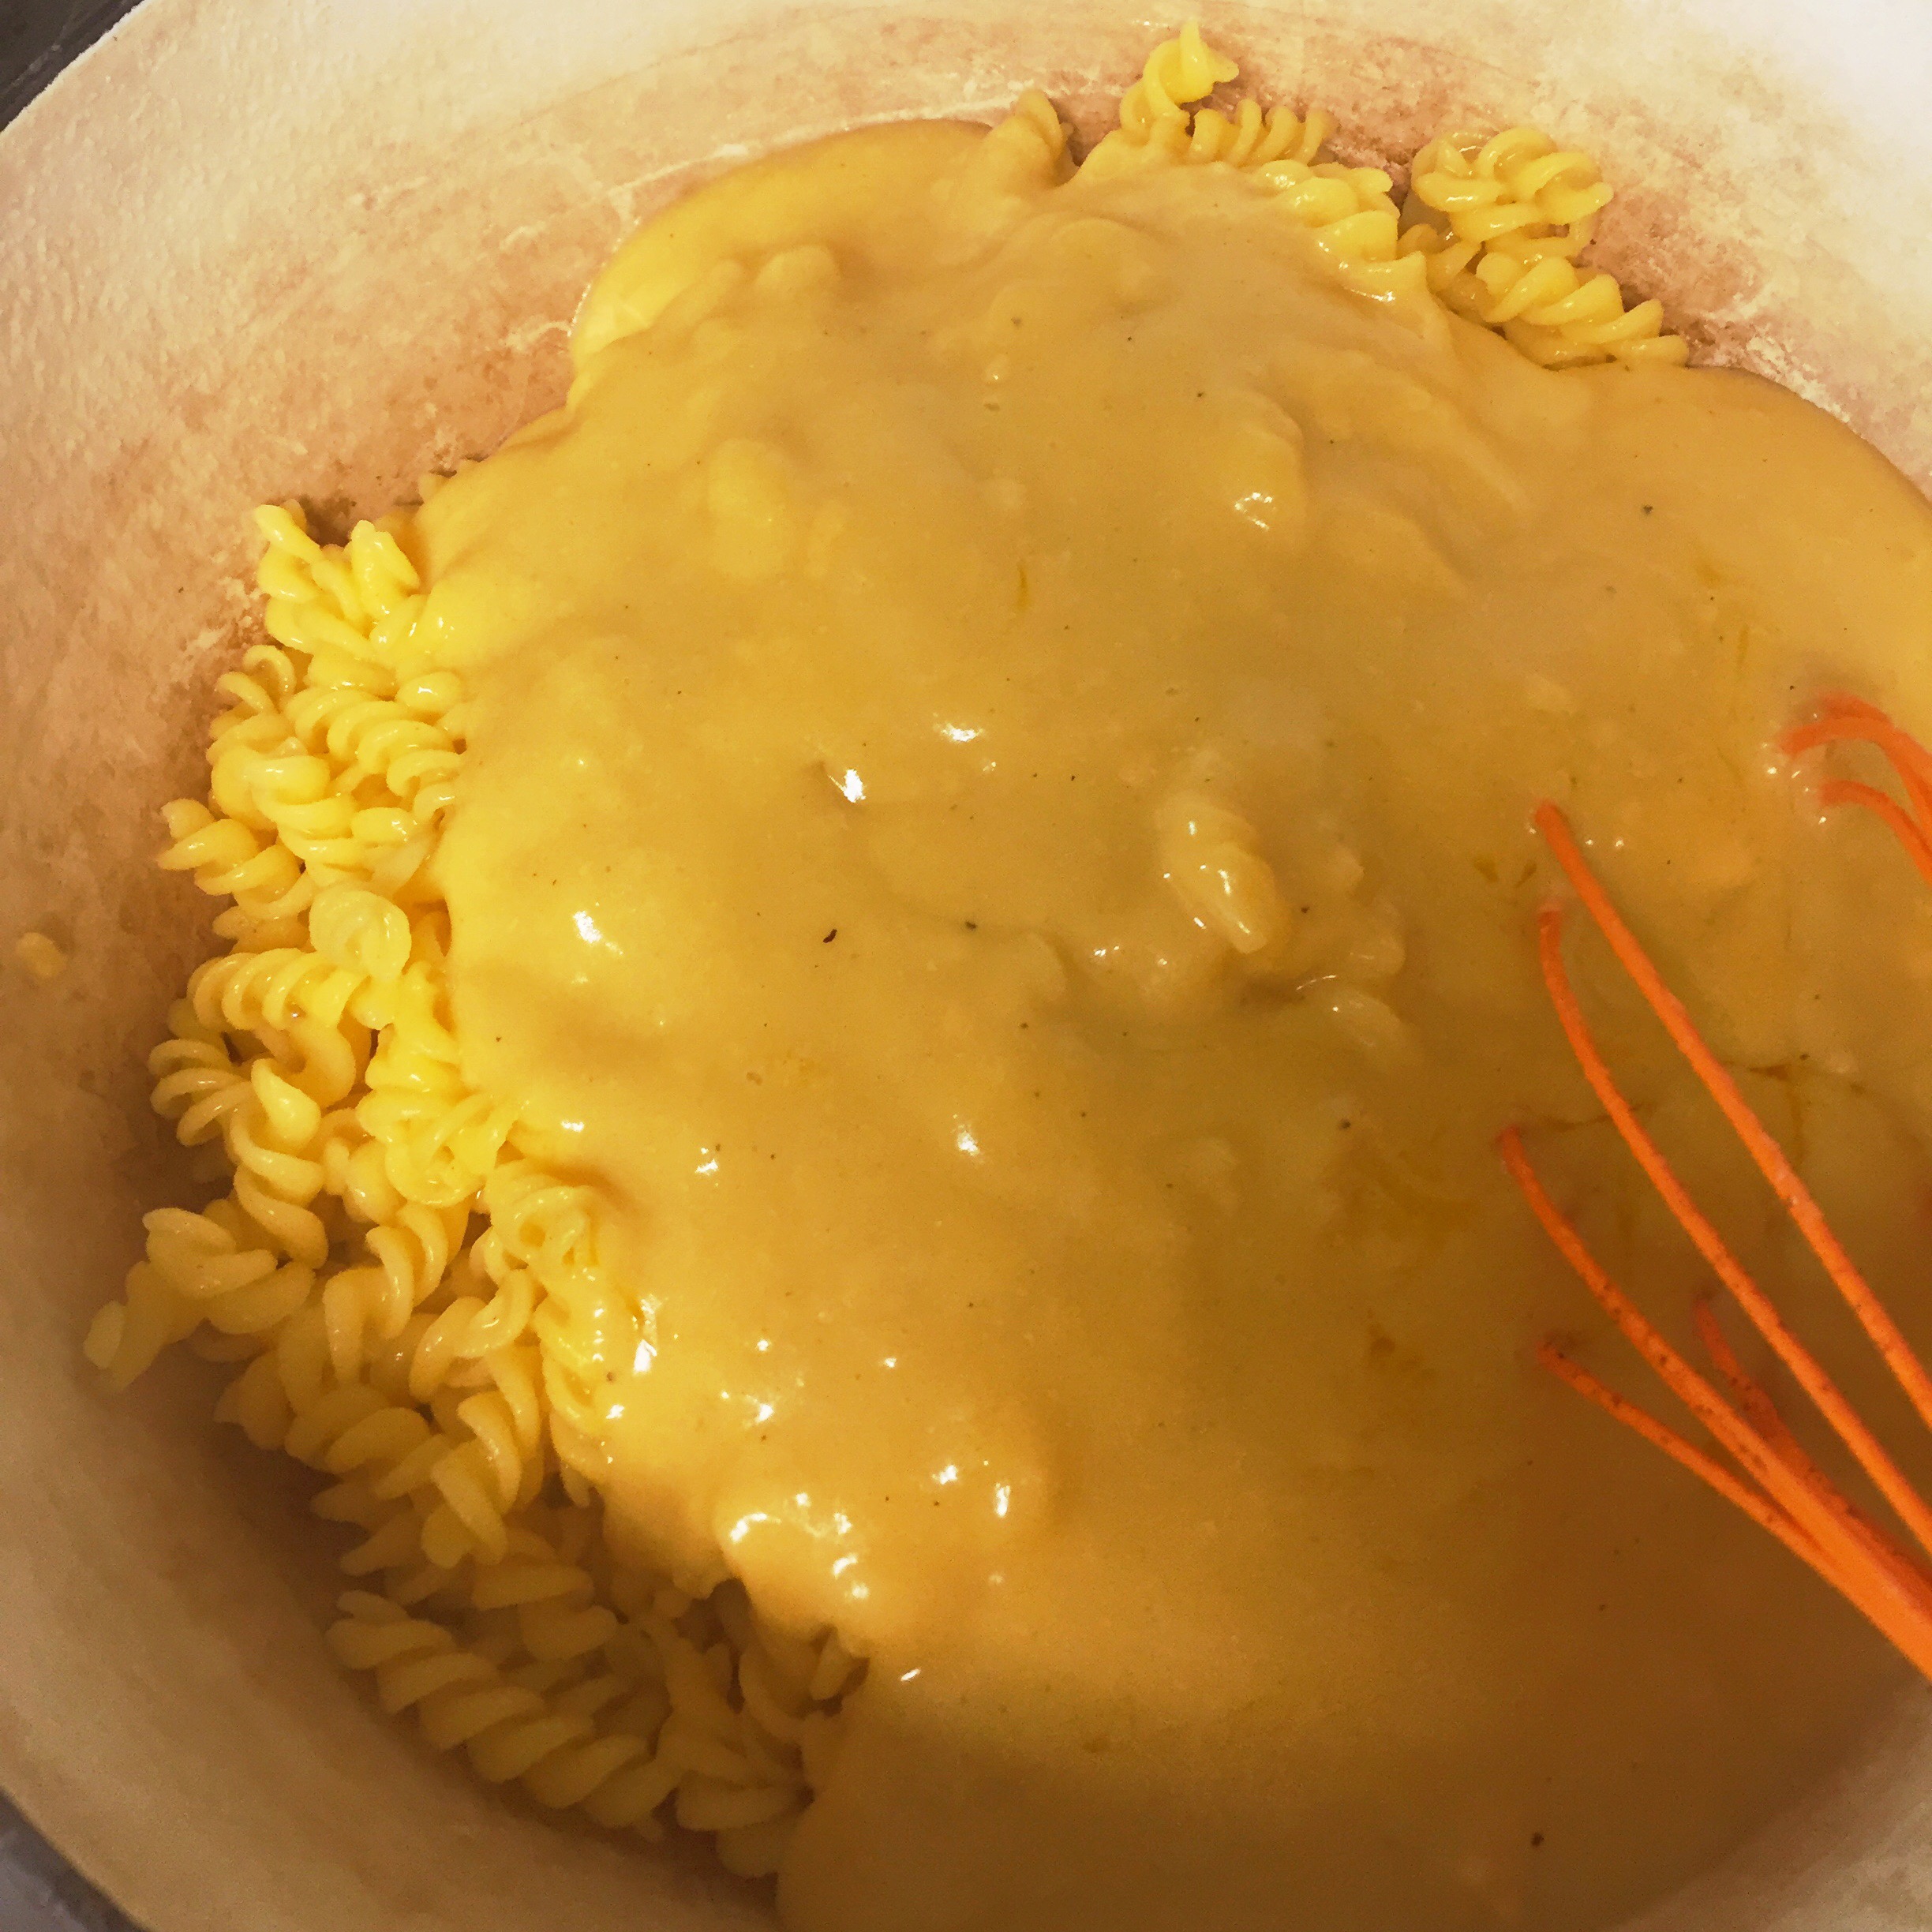
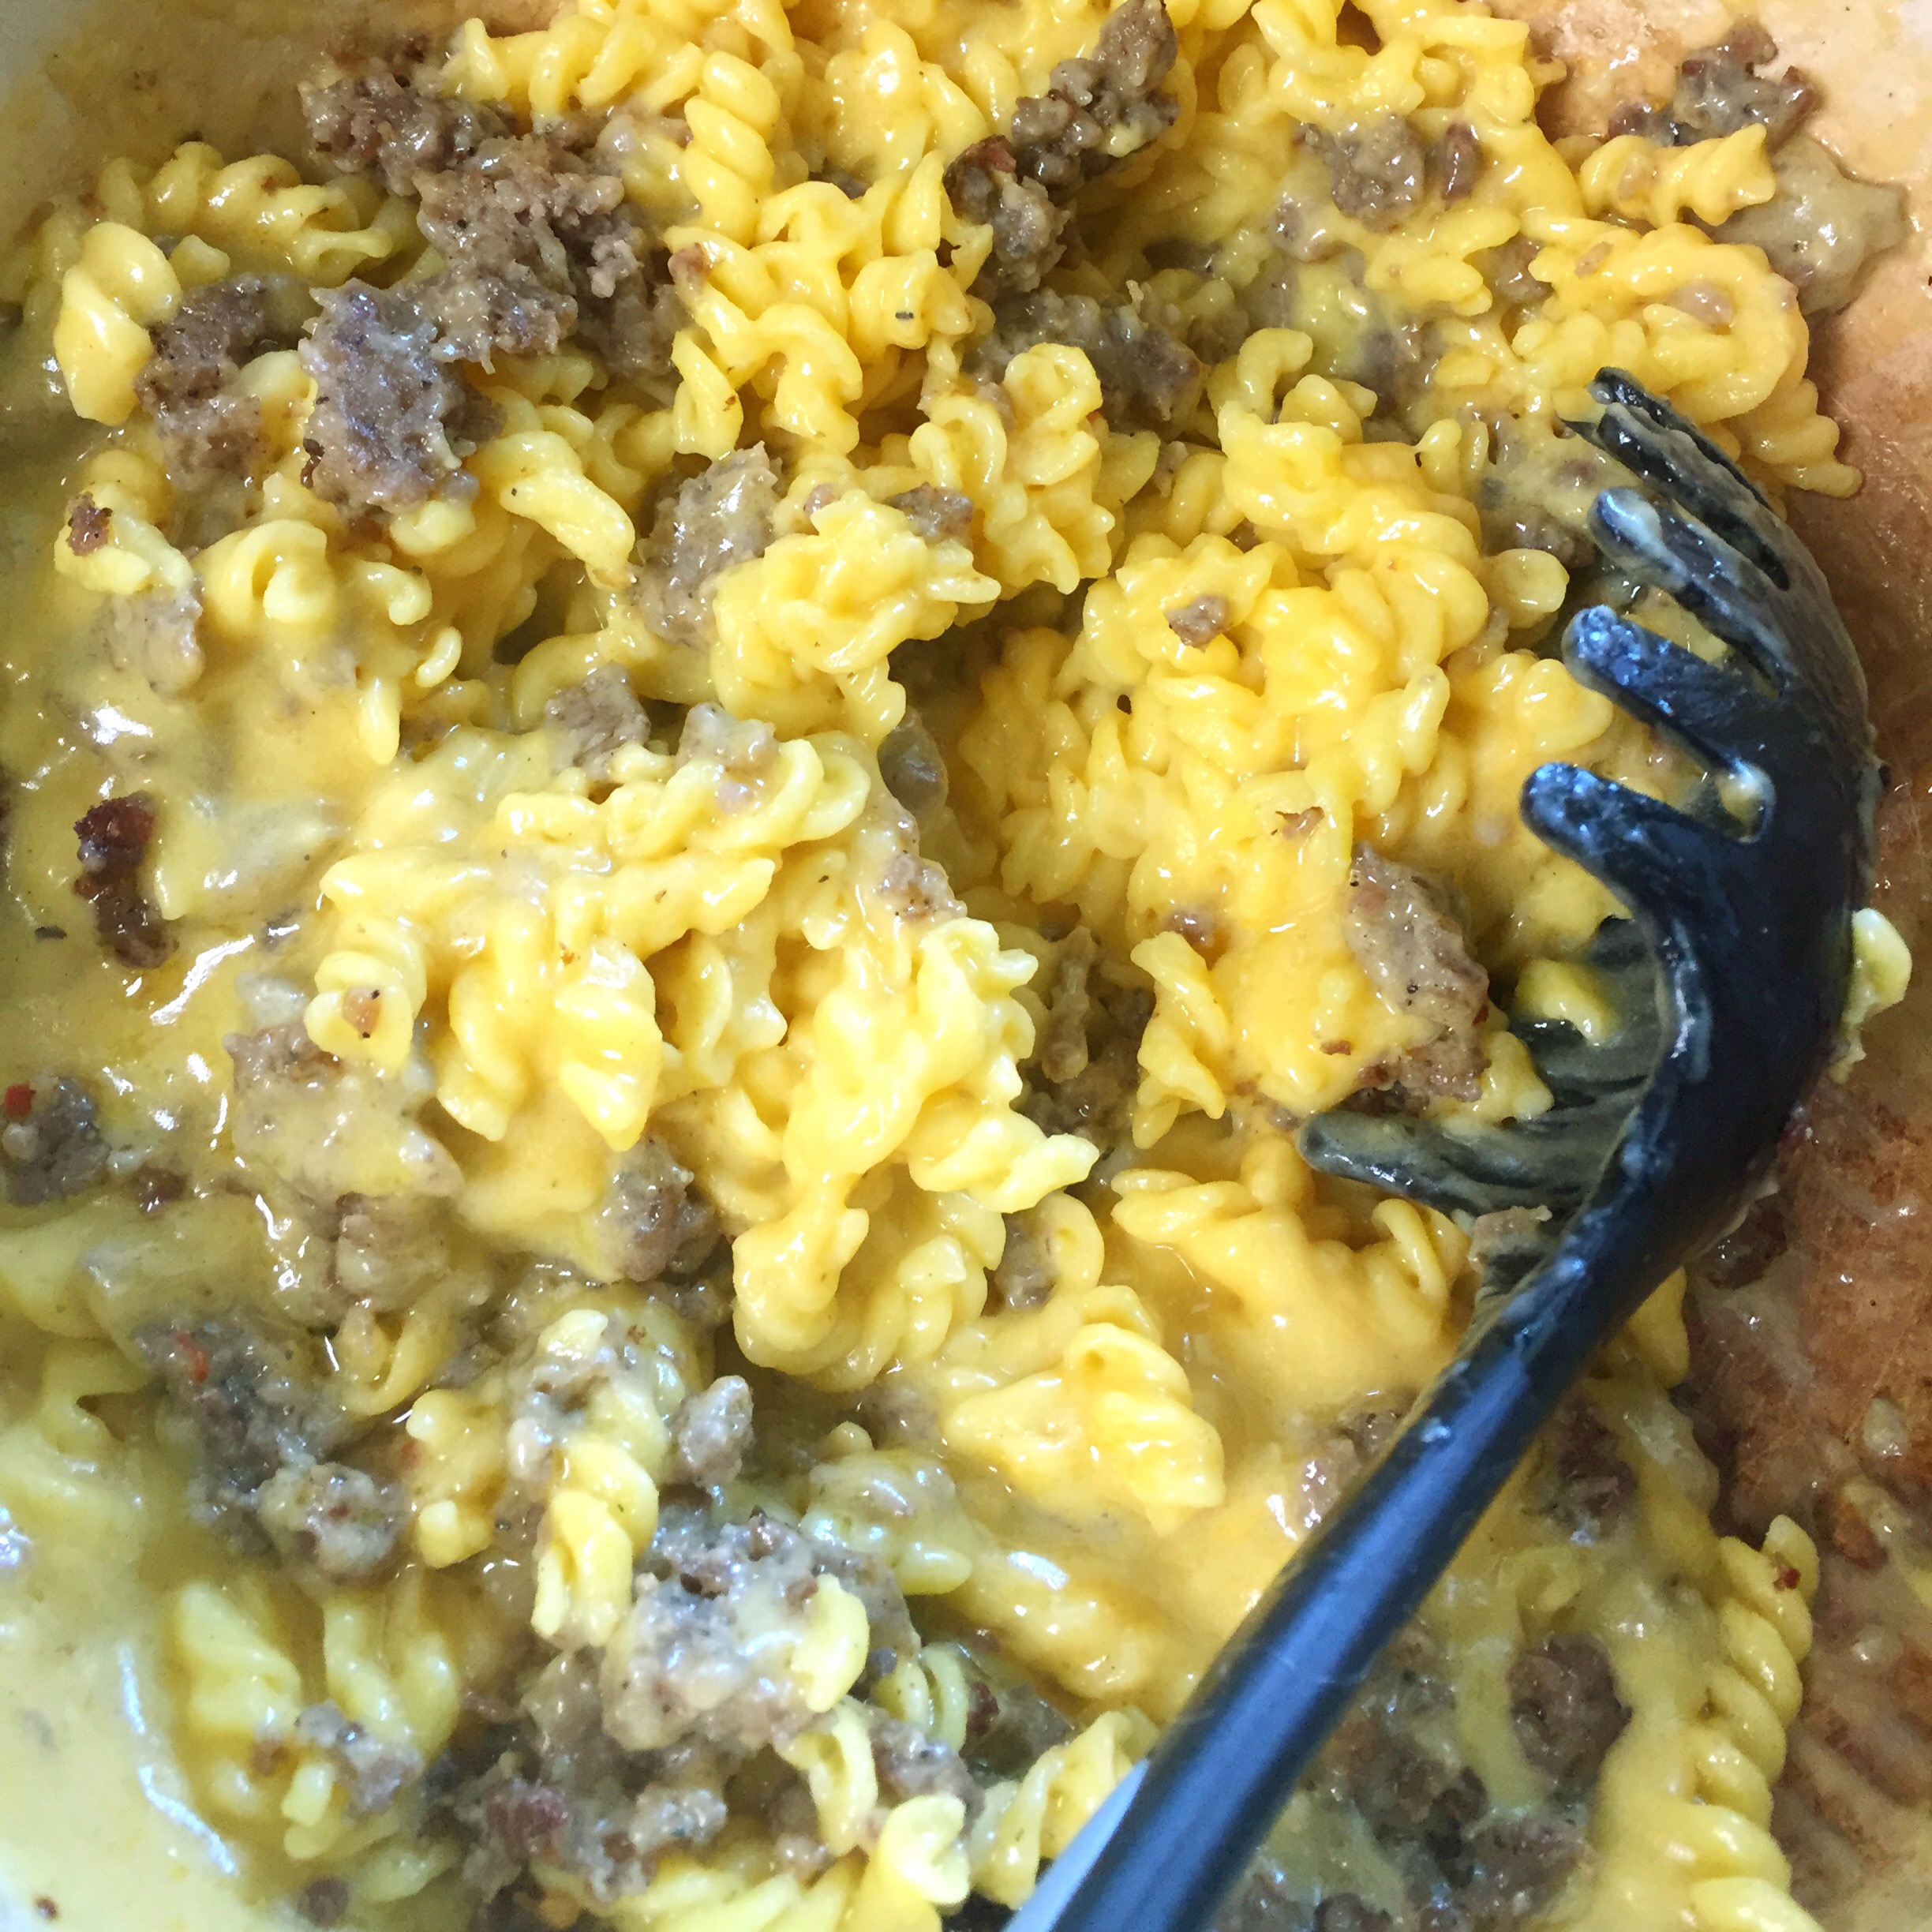
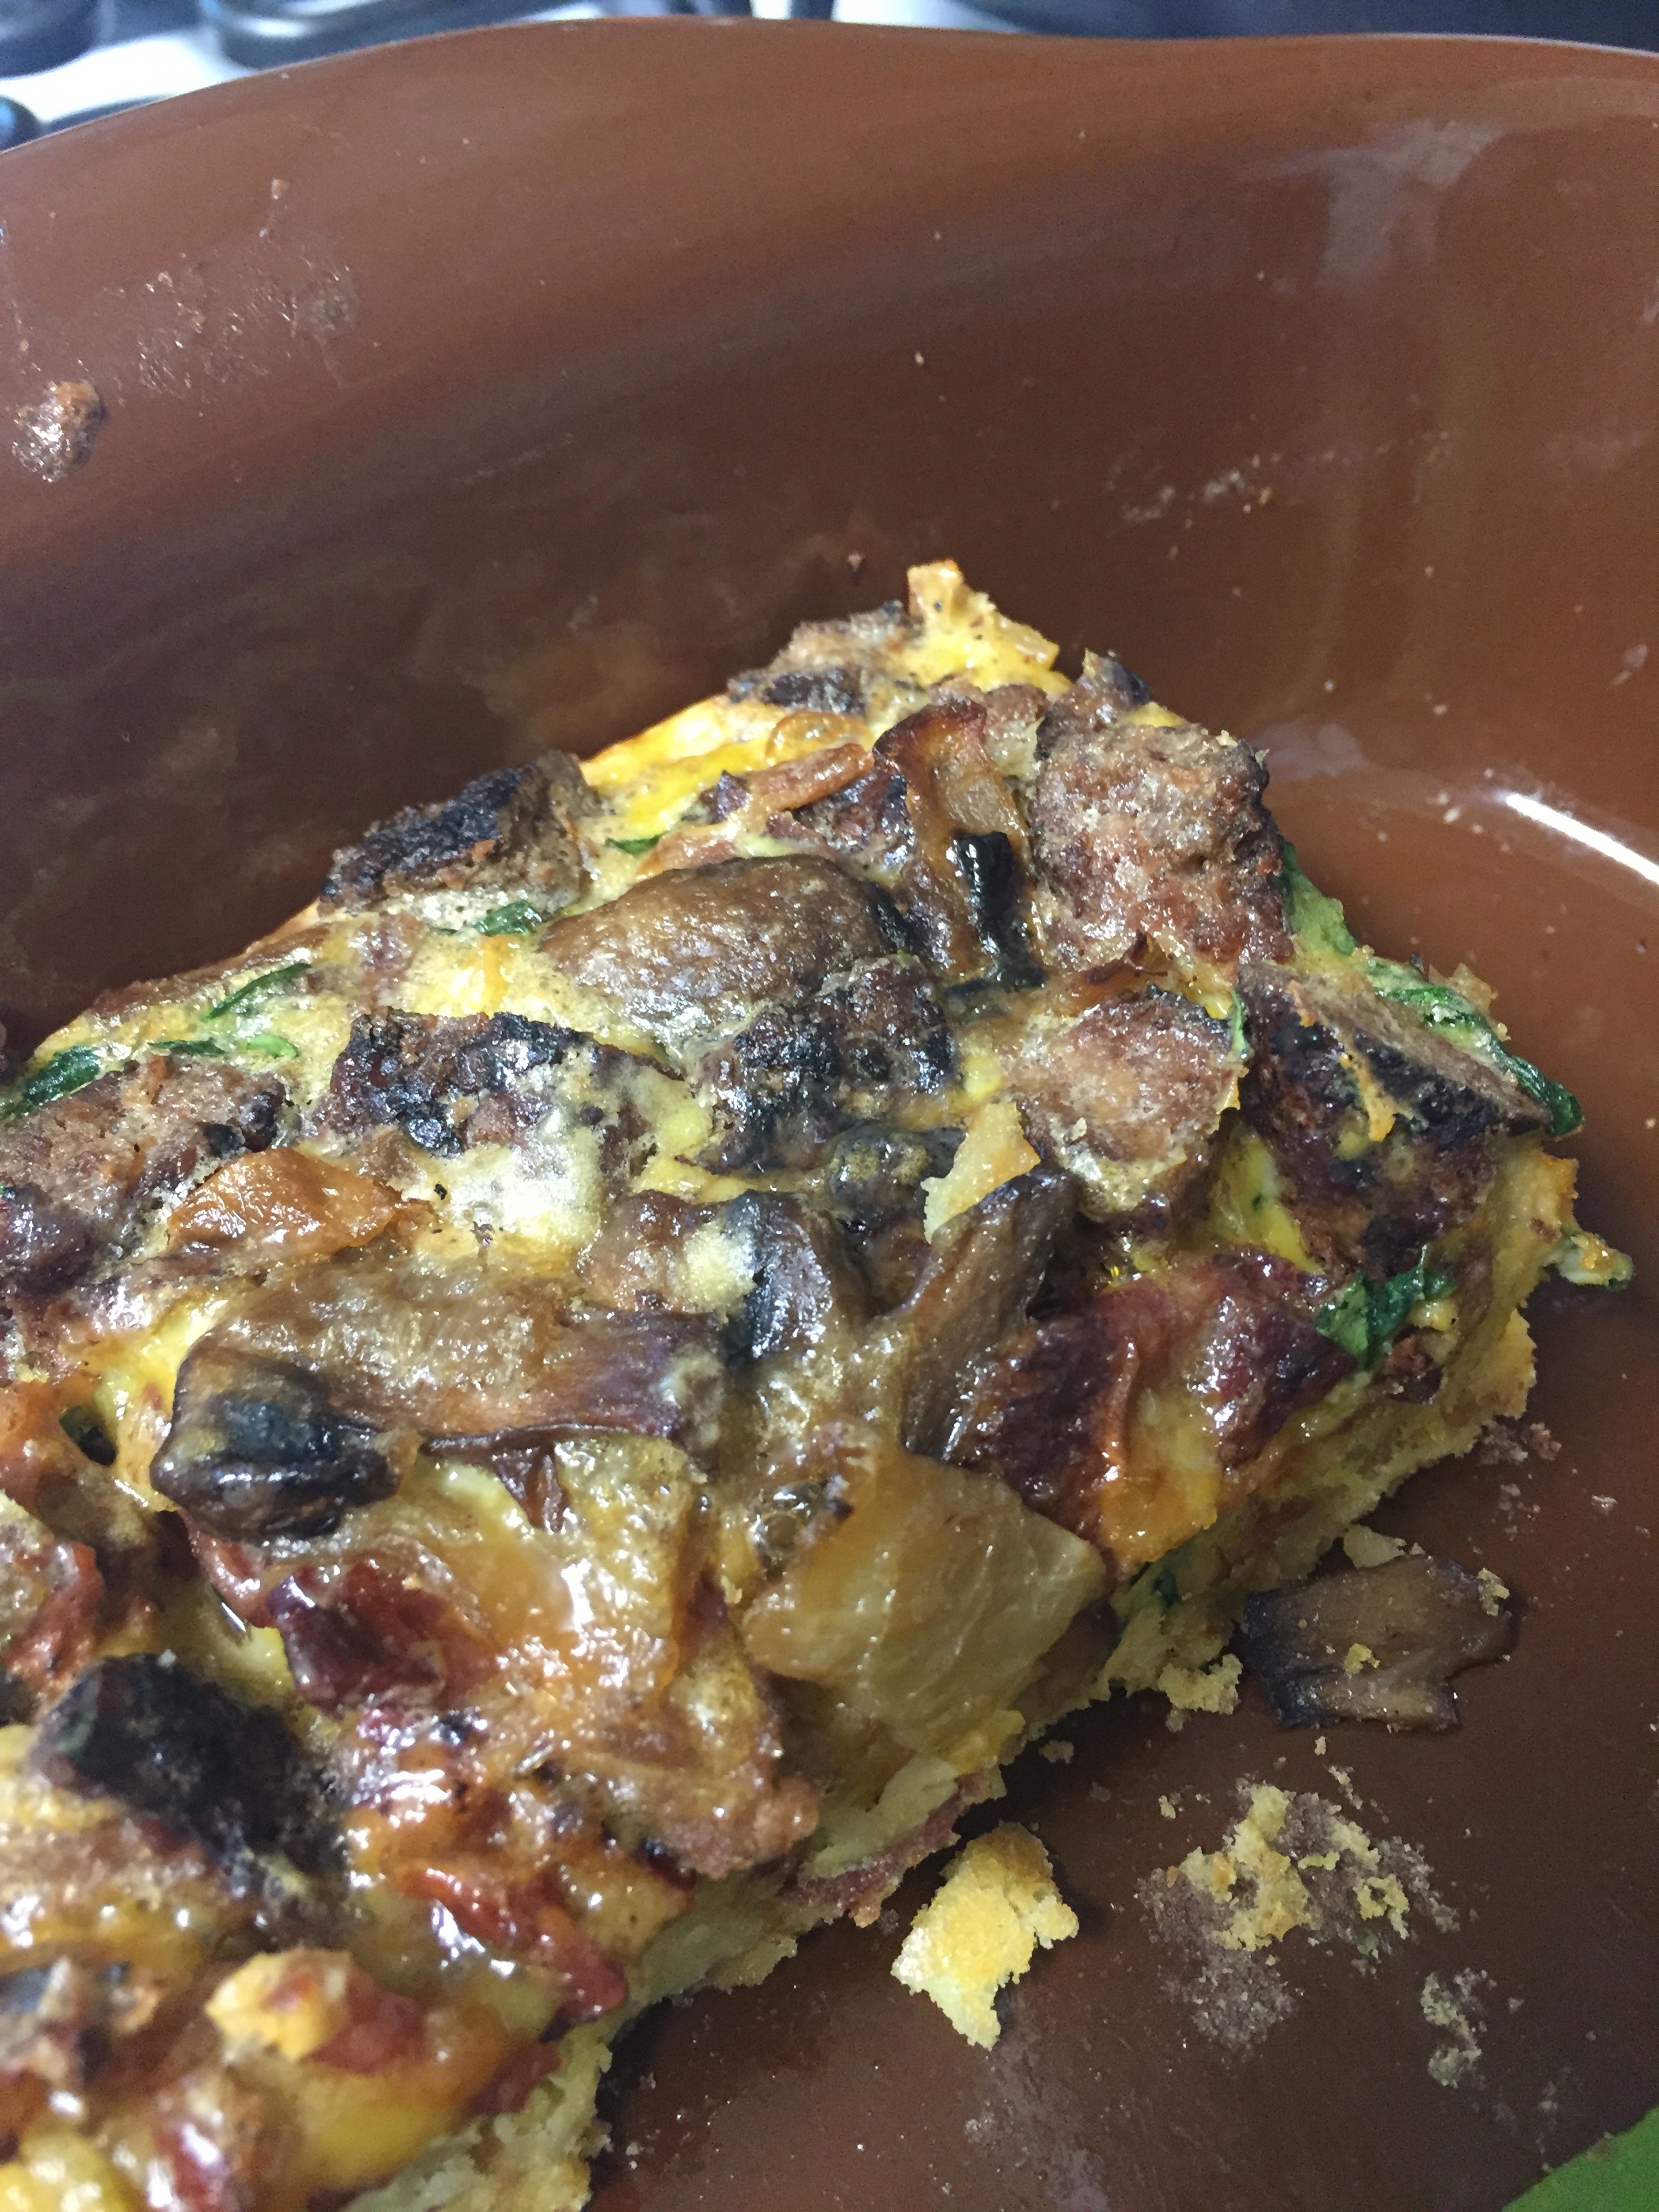
Part of his developing condition was the onset of focal seizures, which are not the typical seizure that people think of, but incredibly debilitating and damaging nonetheless. The Ketogenic diet was originally created as a therapy diet to deal with brain conditions like seizures. We are DEFINITELY not newbies to food restrictions and special diets with all the food allergies and chronic issues that we have been through with our kids, so going Dairy Free Keto was a fairly simple tweak to the diet we already had. It mostly meant taking back out some of the carbs and sugars that we had slacked and let come back in even though we eat a very real food diet already.

For me, the biggest step in making a diet change for our family is the MEAL PLANNING! This is such a foundational part of our week anyway since without the meal plan my days and meals turn into chaos.

1) IMG_2098I have been using the app Plan To Eat for several months now, and highly recommend this for anyone wanting to organize or start their meal planning. I absolutely LOVE this app for scheduling, tweaking recipe changes, saving new found recipes and putting together a shopping list of the week’s meal plan ingredients. This makes a weekly shopping trip a breeze and ensures I have all the items stocked and ready to go for what we plan to eat each week.

2) Once I’ve dropped in both a breakfast and dinner meal plan each day of the week, I transfer them to our Meal Planning Menu board  that is front and center in our dining/kitchen area so the whole family knows what to expect each day.

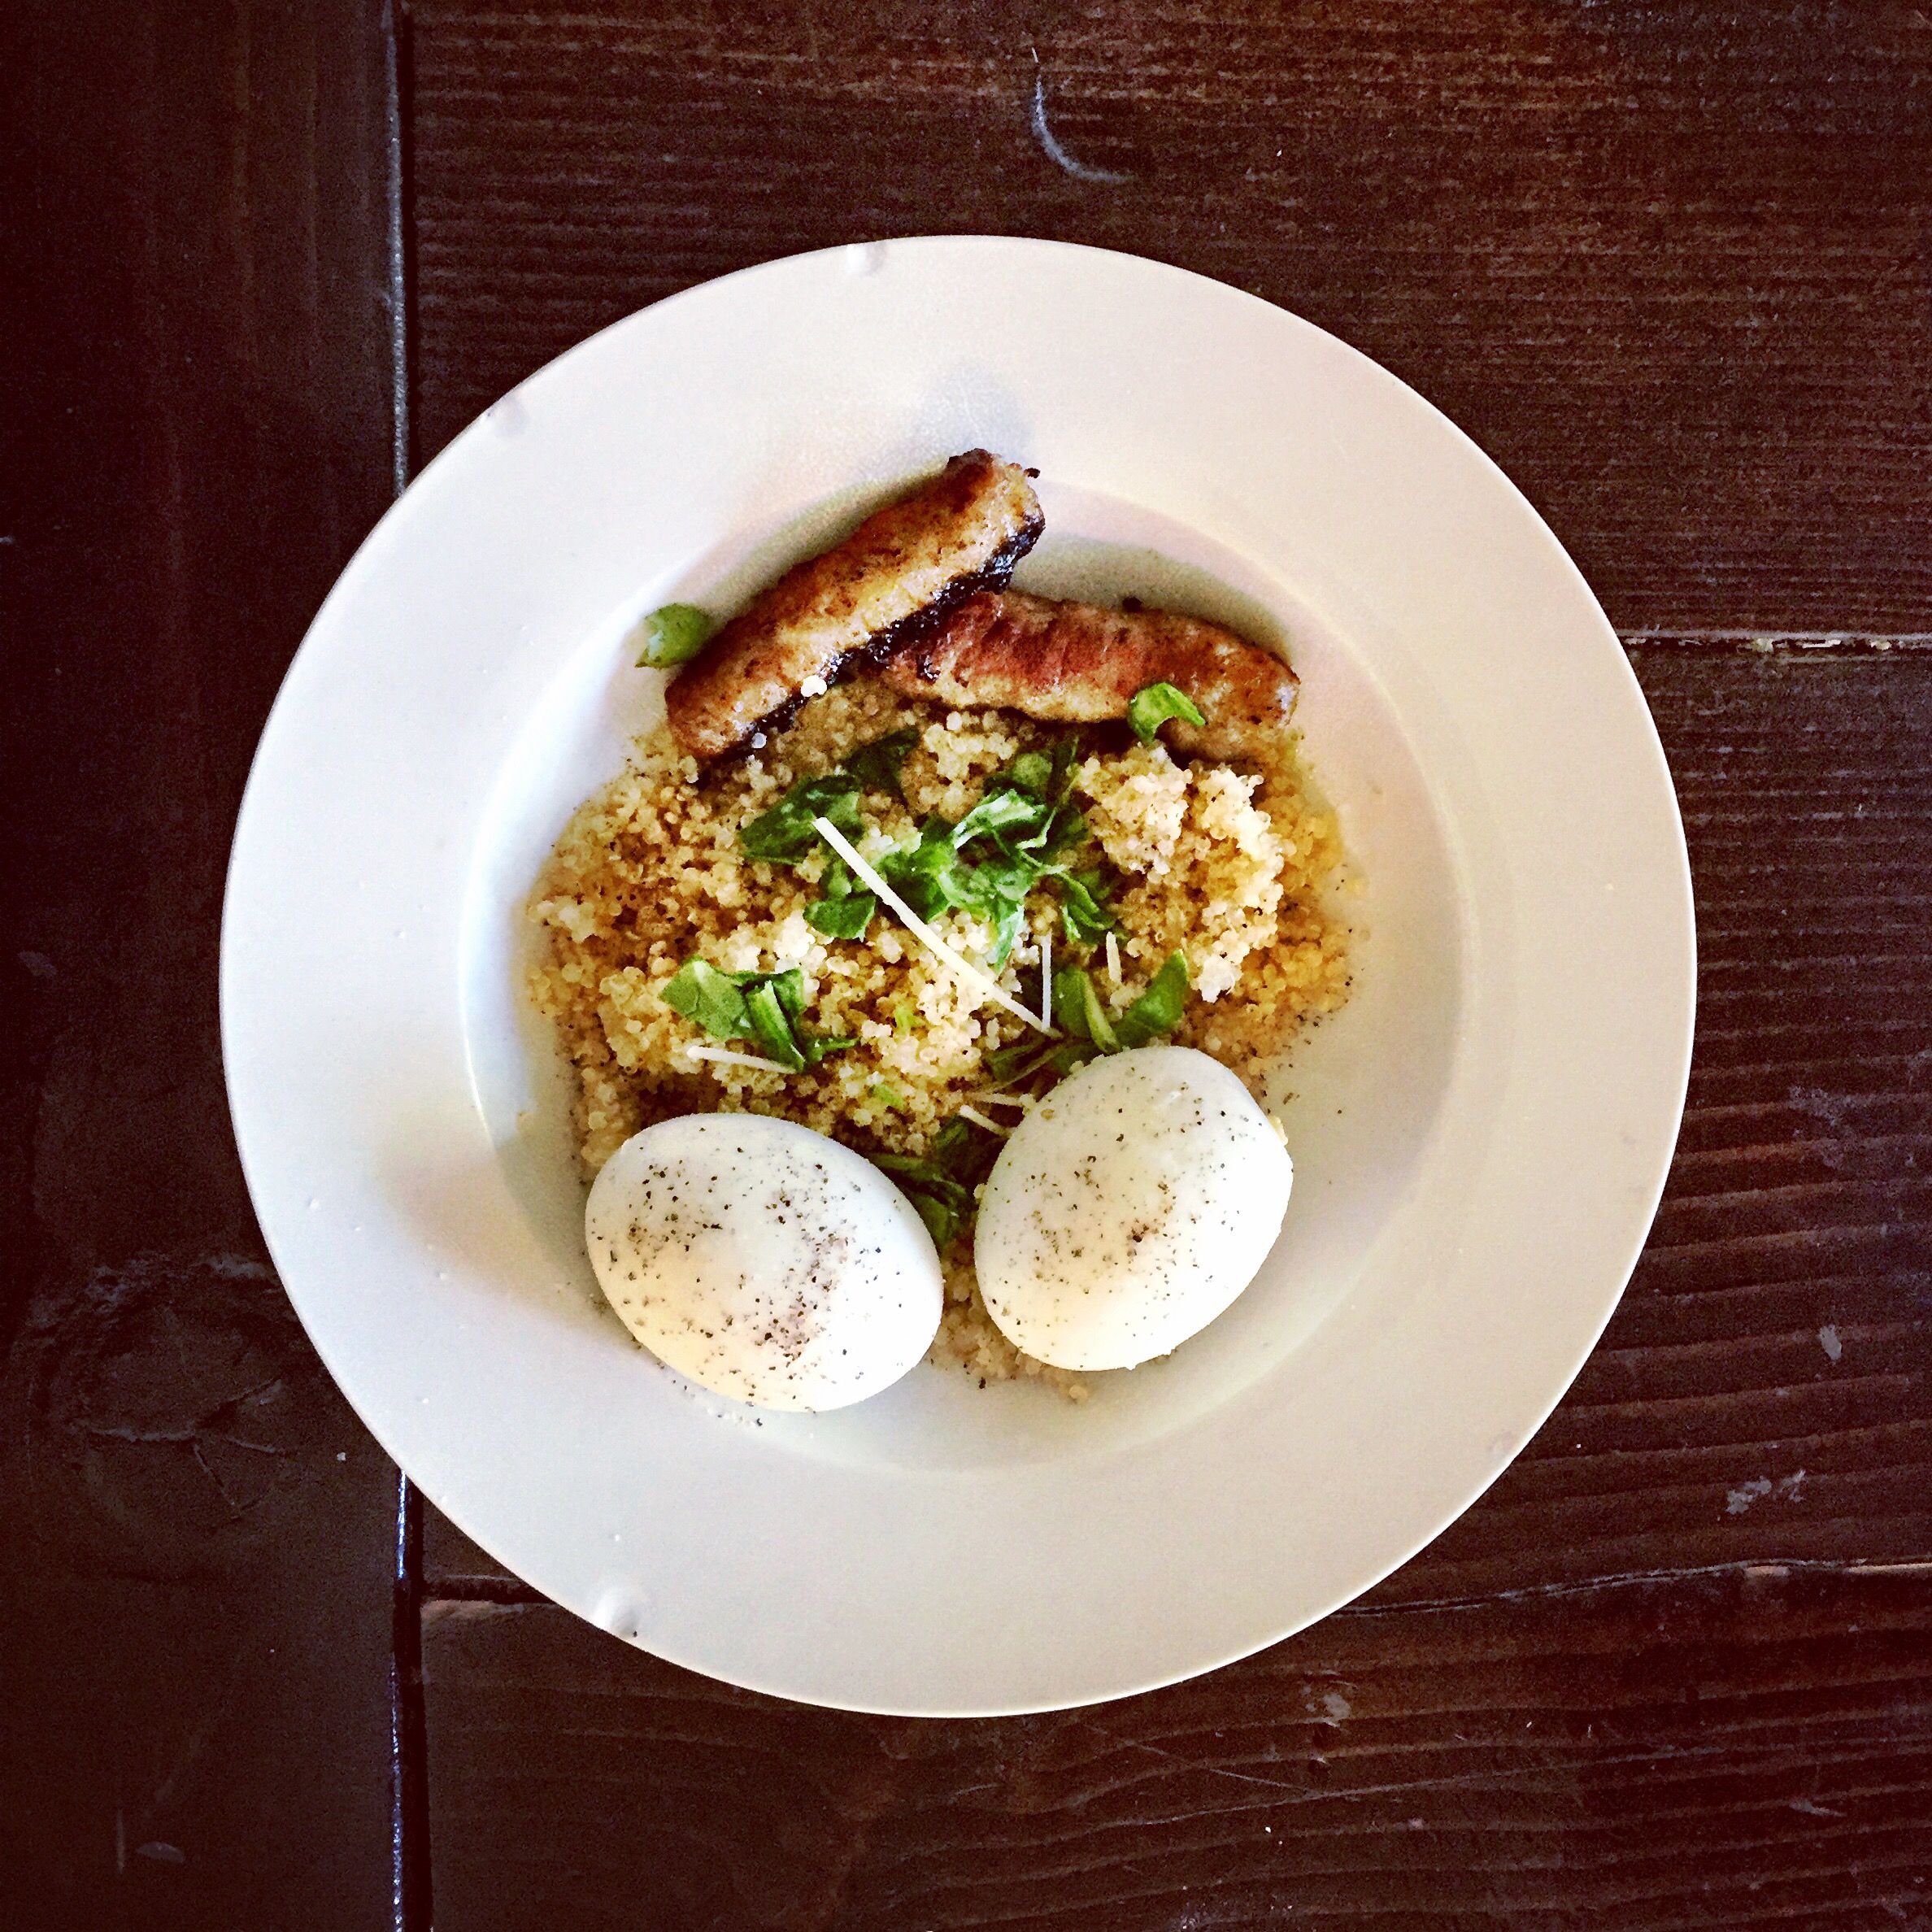
3) Adding breakfast to our weekly meal planning has made a WORLD of difference in our homeschooling routine. I refuse to let the kids eat sugary cereal each morning and call it breakfast, so putting in some variety lets them know what they can expect and what they are only allowed to eat that in the morning, even if they wake up before anyone else. Let me tell you – this has been a GAME CHANGER!

Do you have a meal planning system that you love? Share it with us below! Stay tuned for some of our weekly KETO meal plans and compilation of recipes.

Gluten Free Stirfry

I often make meals that are healthy and meals that taste good, but they do not always align at the same time 😂 I try.

Tonight my 7 year old said as he was eating, ‘this tastes better than cake,’ so I figured this is worth writing down. This recipe is gluten free, dairy free, nut free and soy free and is both Whole 30 and Keto friendly.

I have been transitioning to cauliflower rice for obvious nutritional and health benefits, and am loving these super easy stir fry bowls. I’ve done chicken & broccoli but tonight’s rendition was Ahi Tuna steaks over the stirfry and it was GONE in a flash with rave reviews from all 3 boys. Super super simple.

PREP AHEAD:

Marinade Wild Ahi Tuna steaks a few hours ahead of time with a drizzle of olive oil (I use my fav Rosemary Thyme Infused oil) Coconut Aminos, and crushed garlic. Put in fridge.

Prepare homemade mayo if you do not have any (this is a soy free 4 ingredient super clean condiment that tastes WAY better than anything you get in a store)

  • 1 egg
  • 2 tsp lemon juice
  • 3/4 cup LIGHT TASTING olive oil (do NOT use regular or it will be disgusting)
  • 1 Tbsp spicy brown mustard

Season with a dash of salt and blend all in a cup with immersion blender until nice and thick and creamy

Set in fridge and save for later

——-

When ready to eat:

Use any riced cauliflower of your choice (I have used several brands all with great results, but love the Green Giant with no additives or even seasoning). Pour out desired amount in an oven safe dish and add in a bag of frozen organic mixed vegetables or chop and pre-cook fresh veggies until soft and then add to cauliflower mix.

This is so easy it’s not really a recipe, but the simple seasonings make it go from blah to amazing. Stick the frozen cauliflower rice and veggies in oven or on stove until cooked through and hot.

When almost done, heat skillet over med/high heat and sear/cook the marinated tuna steaks (or can do the same thing with chicken). Depending on thickness I usually do 2.5 min per side for the tuna so they are still med rare.

Before serving, drizzle on coconut aminos over ‘rice’ and veggie mix, salt and pepper.

Top with Ahi Tuna steak and drizzle the ‘mayo sauce’ over the top. Enjoy!

Nourishing Bean Soup

Not only is a warm bowl of homemade soup a fantastic end to a winter day, there are a lot of health benefits that can pack into a soup and it is one way we make sure to get in a lot of good broth and veggies. There are a lot of benefits to upping your intake of bone broth, and with my son dealing with severe autoimmune and gut issues we are trying to make sure that the broth and soups are a regular part of our diet. Of course our soup recipes are always gluten, dairy and nut free thanks to our sons’ food allergies. (the only dairy would be an optional cheese on the top).

This week I chose to try a ham and bean soup. I had saved the ham leg bone from our Christmas ham and had it in the freezer. The base for a lot of my soups starts the same. I chop up a bunch of onion, carrots and celery and cook until softened, then start branching out on my flavors from there. Here is the recipe that I ended up with for this soup and it was absolutely DELICIOUS! One of my favorites yet and even the kids gobbled it up quickly and asked for more.

Ingredients:

  • 1 large yellow onion, chopped
  • 1 bunch of organic  celery, chopped
  • 2-3 cups of organic carrots, chopped
  • 64 oz of organic chicken broth
  • salt and pepper to taste
  • 2 Tbsp organic minced garlic
  • rosemary and thyme infused olive oil
  • 1 ham bone (optional for flavor)
  • 2-3 cups organic spinach leaves, chopped
  • 1 bottle angry orchard crisp apple gluten free hard cider
  • 2 – 15 oz cans of organic navy beans
  • 2 – 15 oz cans of organic cannelini beans
  • 2 packages of aidells natural chicken and apple smoked sausage (browned and chopped)


How to:

  • Add chopped onion, celery and carrots into a large stock pot with some rosemary & thyme olive oil (or oil of your choice) and cook on high until they begin to soften
  • Add in ham bone if you have one
  • Pour in the chicken broth and turn heat down to a low simmer
  • Add in the hard cider to flavor your broth (this is a delicious flavoring), salt, pepper and garlic
  • in a separate pan, brown the chopped chicken and apple sausages until thoroughly cooked
  • add the sausage into the soup
  • allow to simmer for 30 min – a few hours (I personally think the earlier in the day you make them the better the flavor)
  • add spinach
  • about 15 minutes before serving, add in the beans. I like to add them at the end so they are not too mushy, but still have a chance to get warm
  • remove the ham bone and discard
  • pour into bowls and top with some fresh grated Parmesan cheese (if you can do dairy)
  • ENJOY!

Seal Beach

Beach hopping continues! We drove up the coast about an hour to our new destination: Seal Beach! Our campsite here is actually not a campground, but an RV park. We are quickly learning there is definitely a difference between the two! Since we are just starting out, we did not realize (what is probably common knowledge for full timers) that RV parks in general do not allow tents or have campfire pits (which by this time was actually a welcome change). We are at the Seabreeze RV park which is extremely nice, clean and uncomfortably quiet. I’m not entirely sure there is anyone here – maybe just a bunch of empty RVs parked here for the summer? Either way – it’s our first time having FULL hookups!!! We are a bit excited to finally be able to use the sinks without apprehension (though still trying to conserve and be responsible) 😉

Seal Beach is a cute little beach town sandwiched between Huntington Beach and Long Beach just south of LA.

Since we LOVE food and love to find great local places, we often look to YELP to scout out the highest reviewed non-chain (when possible) place to eat that uses real, fresh food that can be made allergen free and safe for the kiddos. Our search in this area landed us at Cesar’s Bistro…

This little spot is AMAZING – we’d highly recommend it. The service was fantastic and it felt like we had known our server forever by the time we left. They were very accommodating to the allergies and had excellent gluten free options since a lot of their ‘breads’ were home made with corn. Check out the presentation here! This is the Caribbean pulled pork and the salad was something I’d come back for alone – so much flavor!

Had to finish off the meal with sweet plantains, of course.

Definitely check this place out if you’re in the area!

San Clemente

We’ve been coming to San Clemente for the past 4 years for every pediatrician appointment that the boys have – sometimes with a 3 hour drive in each way. It is always 100% worth it for so many reasons! First of all, our pediatrician is hands down the BEST there is. We’ve been seeing Dr. Sears for several years and I have never once left there feeling like we did not get amazing care that was completely geared toward the best interest of our kids. Dr. Bob has worked with us to find the most natural options to take care of whatever they are dealing with and has been great to work with through some of our more difficult challenges dealing with 2 of the boys’ food allergies.

The boys love their visits to see Dr. Bob! I also loved that I have been able to partner with the Sears Wellness Institute as a Certified Health Coach to learn more how to support their nutrition and teach others what we have learned through the years. The boys did great on their check-ups and are all super healthy and strong!

While loading up on donuts may seem very ironic after finishing up well visits, we could not pass up a trip to Sensitive Sweets bakery seeing as they are RIGHT across the street from Dr. Bob’s office. It’s not every day (or EVER) that we have a completely allergen free bakery in the area, so it was super fun to take the boys in and they could have ANYTHING they wanted and know it was completely safe. They are a gluten free, dairy free, nut free, peanut free, soy free, egg free bakery with 2 locations in CA. For those of you who only dream of a place like this, check them out at www.sensitivesweets.com because they SHIP too! Awesome! So the boys could not decide so we did a little sampler of the blueberry muffins, cupcakes, donuts and pumpkin spice donut holes. 🙂

For those who have kids with food allergies, you know how happy it makes your heart to see them enjoy a rare treat that normally they cannot have. <3

San Clemente is such a charming little town. Since we are looking for a small cabinet to store our computer in while we travel, I had fun searching through antique stores. La Casa Verde is a cute little shop on Granada St that you definitely want to check out if you’re in the area! Some of our FAVORITE spots to eat are South of Nick’s (upscale Mexican) and Mimosa’s for breakfast/brunch. The Fisherman’s is another great spot if you want to grab fish and chips on the pier, but it’s super touristy and usually has a long wait, so we prefer the more local stuff off the beaten path.

There are few places as charming as wandering the streets of San Clemente. We literally could stay here forever, but we have to get rolling on our adventures, so time to say adios and start our drive up the coast! san clemente 4

marshmallow dreams


Funny the questions that have been popping into my head about people who travel and live full-time at campgrounds. Tonight the thought struck me that they probably get really tired of campfires. {gasp} I know it seems like such an awesome part of outdoor life, but in reality, smoke and sticky marshmallows surely lose their charm night after night, right?

Good news is that for us, they are still magical and every bit an essential part of this camping life. (Though I quickly learned not to leave the airstream windows open next to the fire ?).

My boys have an obsession with burning their marshmallows to a crisp and declaring it ‘perfectly done!’

You may wonder how S’mores work for kids with food allergies. We have come up with 2 alternatives that are not just acceptable, but in my opinion far surpass the traditional S’more…

1) Sharf brand gluten free shortbread cookies. These paired with toasted marshmallows are so good, you usually forget the chocolate, but the Enjoy Life Dairy Free Chocolate Chunks make an excellent addition if you remember to put them on.

2) Betty Crocker’s Gluten Free Brownies  (this one is still their fav of all the gf brownie mixes). Bake up a batch and top it with your roasted marshmallow for a really indulgent campfire treat!

There’s no way we’ll be able to make this a nightly event, but since we are just starting out you’d better bet the boys are LOVING some evening camp fires and marshmallows!

Wild orange and cassia gluten free coconut French toast

This is the best French toast, and so so easy. We use gluten free bread because of food allergies and coconut milk gives this the perfect sweet touch while keeping it dairy free!


Here’s the recipe:

  • 1 loaf gluten free bread (or bread of your choice)
  • 2 eggs
  • 2 small cans of organic coconut cream 
  • 2 tsp cinnamon powder
  • Dash vanilla extract
  • 2 drops doTERRA wild orange essential oil
  • 2 drops doTERRA cassia essential oil

Mix all ingredients (except for the bread)? in a stand mixer and blend until smooth. Soak each piece of bread in mixture until coated and pan fry in coconut oil. 

For an extra sweet treat, top with cream cheese and maple syrup!

It’s that easy. Enjoy!

dairy free gluten free mac-n-cheese

I wish I had a video of the dancing that ensued in the kitchen when my boys found out I was going to attempt a ‘safe’ mac-n-cheese. When you go your whole life allergic to dairy and wheat, you don’t get this as a dinner staple….or at all. My 6 year old had never had it, but when we ordered food and a local place accidentally delivered a side of mac-n-cheese that my 4 year old (not allergic kid) devoured. Their curiosity was peaked for this ‘kid’ food staple.

So I finally decided making a ‘cheesy’ sauce with no cheese couldn’t be that hard, right? While we usually try and change our diet rather than sub food, we have incorporated some shredded Daiya brand ‘cheese’ into a few dishes and the boys feel like they are getting something cheesy (quesadillas are their fav)

So for this Mac-n-cheese I started with a pack of organic gluten free rice/corn blend fusilli (who doesn’t love the spirals!!).

 Here is the recipe for the ‘cheese sauce’ though I apologize – I never really measure anything.

Start by melting the butter over med heat until liquified, then adding in the gf flour to make a rue.

Once this paste is formed, add in the Daiya shreds and let them melt and add in flax milk to cream it up. Whisk the blend until smooth and creamy.

 Add in salt to taste, the grated nutmeg (bc everything cheesy is better with nutmeg) and remove from heat. Stir in 2 drops of dōTERRA black pepper oil for an amazing flavor boost.

Drain pasta and drizzle on some Rosemary & Thyme infused olive oil. Top with cheese sauce and watch your dairy free kids smile with delight and gobble it up!

We kicked it up a notch my adding in some natural sausage – browned and crumbled into the mix. You can sneak in chopped spinach as well!

gluten free instant pot quinoa breakfast bowl

This is hands down my new favorite quick and healthy breakfast. Have I mentioned how much I LOVE our instant pot? 

For this breakfast bowl…

STEP 1: start your breakfast meat cooking (optional). We love the Jones Farm Natural Maple Sausage Links and cook up a batch of those while the rest is preparing

STEP 2: make quinoa in your instant pot (if you have the Bluetooth instant pot there is a recipe script on the app). If not, add:

  • 2 cups quinoa (rinse it first)
  • 3 cups water
  • A few shakes of sea salt

Close and lock the lid, select manual and drop it to 1 minute

Let it release naturally after 10 minutes

When pressure releases, fluff with fork and drizzle with rosemary & thyme infused olive oil

STEP 3: We routinely make soft boiled eggs with the instant pot. It is SO easy with perfect results every time!

Insert your rack into the instant pot. Add about 1/2-1 cup water and however many eggs you want to boil

Close and lock lid. Set to 4 minutes on manual. If you like them really soft boiled, cancel it when the cook time is done and manually release the pressure. Otherwise, let it naturally release in 10 min and they are more like medium boiled eggs (no runny yolk).

Once pressure is released, put eggs into cool bowl of water with ice to stop the cooking. The shells are a breeze to peel this way too.

Peel your eggs

STEP 4: prep your veggies. I love adding chopped spinach and/or avocado but you can do whatever you’d like

ASSEMBLY: scoop some of the rosemary & thyme flavored quinoa into a bowl. Add in a few peeled eggs, your sausage, chopped veggies and sprinkle with Parmesan or sharp cheddar (optional). Add in some fresh grated sea salt, lots of freshly grated black pepper and dig in!


Gluten Free Irish Soda Bread


This bread is good any way you slice it. I compiled ideas from several recipes and this is what I came up with… We started making this for St Patrick’s Day 2009 and it has been a favorite ever since! Since this one is not easily adapted to be dairy free, we have avoided it for the kids until this year. Now that we are able to do baked egg and milk, we converted this to a gluten-free variation this week. The texture is a bit more dense, but the flavor is still spot on!

IRISH SODA BREAD

1/2 cup white sugar

2 cups white flour***

2 cups wheat flour***

***[for gluten free, sub these for 4c gluten free complete flour mix]

2 tsp. baking powder

1 1/2 tsp. baking soda*

3/4 tsp. salt

1 cup currants

1/2 cup craisins

1/2 cup pecans [nut-free sub for sunflower seeds]

1 Tbsp flax seed, pecans

1 Tbsp. caraway seeds

2 eggs lightly beaten

1 1/4 cups buttermilk

1/2 cup sour cream

1/2 cup plain yogurt**

**(can substitute yogurt/sour cream) If using ALL sour cream, decrease baking soda by 1/2 tsp. If using ALL yogurt, increase baking soda by 1/2 tsp.

1. Preheat oven to 350 degrees F (175 degrees C). Grease a 10 inch round cast iron skillet (or could use round baking or cake pan)

2. In a mixing bowl, combine flour, sugar, baking powder, baking soda, salt, raisins and caraway seeds. In a small bowl, blend eggs, buttermilk, sour cream and yogurt. Stir the liquid mixture into flour mixture just until flour is moistened. Knead dough in bowl about 10 to 12 strokes. Dough will be sticky. Place the dough in the prepared skillet or pan and pat down with a dusting of wheat flour. Cut a 1 in. by 6 in. deep “X” into the top of the bread before baking.

3. Bake in a preheated 350 degrees F (175 degrees C) oven for appx 50 min or until brown and pulling away from sides of the pan. Turn bread onto a wire rack to cool.

how to make kombucha

Kombucha can be intimidating, but once you jump in and realize that your scoby won’t jump out of the jar and eat you in the middle of the night (and that it is harder to kill than a goldfish) you’ll think this is super easy. I will do another entire post about the importance of gut health and the benefits kombucha can give, but this will focus on the how-to.IMG_9347

Things you’ll need to get before you start:

  • a scoby (I’d suggest asking around to all your natural minded friends and there’s a good chance someone will know someone who has one they would be happy to part with. If not, you can often get them at local health food stores)
  • a large glass jar (1-2 gallons or larger) I love the ones with the pour spout as it makes continuous brew kombucha SO easy! This is the jar I use and LOVE.
  • a piece of breathable cloth or a tshirt you can cut to make your ‘lid’
  • a rubber band to hold on aforementioned lid
  • enough black tea to brew however many gallons your jar will hold
    NOTE: get PLAIN black caffeinated tea. This is not the time for the decaf and DEFINITELY don’t do herbal. Scoby will not like that.
  • organic sugar (1 cup per gallon)
  • class containers to house your kombucha
    NOTE: If you do a 2nd ferment (the part that makes it yummy and fizzy) you will want to invest in some EZ cap long necked glass flip top bottles. These work SO much better than any others if you like a lot of carbonation These are my FAVORITE!
    You will also want fruit, herbs or fruit juice to flavor your 2nd ferment.

IMG_9693HOW TO:

1) Brew your tea as directed in another container and add your sugar. Let it cool to room temp.
**the temp is super important for the scoby. Do NOT EVER pour your scalding hot water on him, and freezing cold tea will put him into hibernation**

2) gently pour your tea into your large container with your scoby. It should rise to the top. If it doesn’t it may be the temp is off but eventually it should float. if you have to reach in there or touch it with any type of utensil, just do NOT use reactive metal.

3) cover with your [clean] tshirt piece and rubber band that on. I suggest using a dry erase to mark the date so you know when you’ve started this masterpiece.

4) leave it alone in a nice corner where it won’t get too hot or too cold. let it sit there for about a week and then give it a sip. Don’t be scared of the scoby. Just dip a plastic spoon in there and give it a taste. The longer it sits, the more that scoby will eat the sugar, making the health benefits great, but the flavor will start to really sour (vinegary) the longer that it sits. Some people like to let it go for 2 weeks – I personally have found 8-9 days is great for my liking.

5) this is where you can drink it as-is or choose to go to 2nd ferment. This is my favorite part, but will require a few additional containers. If you paid attention and got the EZ cap flip top glass bottles (mentioned above), now is the time to pull those out. click here to get the cobalt ones I LOVE!

2nd FERMENT

6) pour your kombucha into your smaller containers and add about 1/4 c juice to every 16 oz container that you fill with kombucha. MAKE SURE to leave enough room for this stuff to ‘breathe’ so do NOT fill the bottle too high (1-2″ space left at the top or in the neck)IMG_9470

7) seal your bottles and let them sit anywhere from 2-10 more days on the shelf. only refrigerate them when you are ready for the fermentation to stop (when it is sufficiently carbonated to your liking)

8) carefully pop open the top (it can get SUPER fizzy) and enjoy your handiwork knowing that you are getting a great probiotic drink at a fraction of the cost to buy it in the stores!

2nd FERMENT FLAVOR OPTIONS:

There are endless possibilities when it comes to how you want to flavor your 2nd ferment, but here are a few that I’ve tried and our favorites:

~ Organic Cranberry Pomegranate juice – LOVE
~ Organic Blueberry Pomegranate juice – LOVE
~ Pineapple juice – my FAVORITE
~ Apple juice – MEH – It’s really good if you let it carbonate a lot and then tastes like sparkling cider, but otherwise tastes more like ACV
~ Fresh Peach slices – NOT A FAN – Love the idea of the fresh fruit, but this just didn’t add enough sugar to carbonate it to my liking and still had a strong vinegar taste

The BEST part about flavoring your kombucha is that you can also add in a drop of dōTERRA essential oil into the 2nd ferment (make sure it is one that is safe for internal use). They give an amazing burst of flavor!

Check out some of these combos (and msg me if you need any of these oils):
Blueberry + Pomegranate + dōTERRA Lavender
Blueberry + Pomegranate + dōTERRA Lemon
Blueberry + Pomegranate + dōTERRA Tangerine

You can also add in things like cinnamon, herbs, oils, turmeric, etc. I’ve found powders like cinnamon and turmeric add good flavor, but they leave a thick sludge at the bottom, so be prepared to either suck it up and drink that or strain it out.

Would LOVE to hear your favorite flavors, tips and tricks!

Breakfast casserole

Our lives have taken a step in an exciting direction with the discovery that our oldest can have eggs as long as they are baked into something and thoroughly cooked! We LOVE eggs, and I feel like some mornings, breakfast just isn’t complete without them. For years we just made due, but I have recently been able to incorporate a breakfast casserole and my little one is ecstatic!

This is so easy and versatile – it takes about 45 min to bake so it’s great to get up and throw in early before they all get crazy and hangry.

Here’s a picture of our casserole today before it has been baked. It was a great way to clean out the fridge from the random meats, sides and veggies from the week!
Ingredients:

You can literally throw anything into this! Here is what we usually do:

  • Pre cook a roll of natural sausage or breakfast meat
  • Add chopped (pre-cooked) potatoes or even throw in a layer of frozen fries or tots
  • Chop in veggies you have in the fridge (mushrooms, spinach, zucchini and onions are our favorites)
  • Add cheese if you can have that. We aren’t quite there but sometimes I mix in some dairy free Daiya cheddar shreds
  • Mix about 8-12 eggs until they are whipped up, adding in some cream or milk of choice, salt and pepper (I love adding in 1-2 drops of dōTERRA Black Pepper essential oil)
  • Because we still need a binder with our eggs to make them safer, I add in about 1/4 cup gluten free bisquick to the egg mix

Grease a 9×13 casserole dish and grease the bottom. Throw in your meat, potatoes, veggies and then pour your egg mix on top to set it all!

Bake at 350 for appx 45 min or until egg part is thoroughly cooked! It’s a huge hit every time!


Asian Spiced Shrimp

Check out this awesome recipe using dōTERRA essential oils by Mandy Osburn!!

Asian Spiced Shrimp

Mix shrimp with 1 drop of each Lemon, Lime and Ginger dōTERRA essential oils! IMG_9689
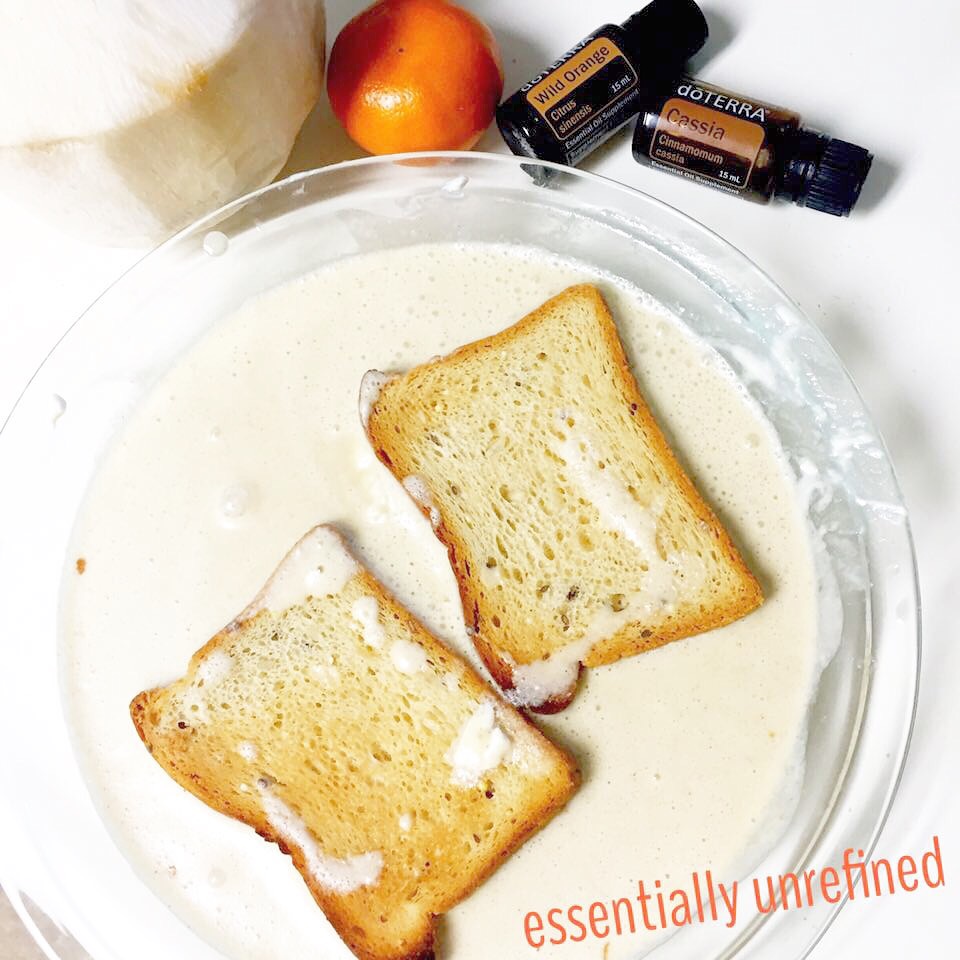
I also used a dash of garlic & onion powder, Himalayan Salt, pepper and an Asian spice I bought at Costco!

dōTERRA essential oils are the best thing to give your meals a great clean flavor boost. Check out that fresh salad on the side. Have a great Blessed day peeps!

IMG_9688

me and kombucha

I’ll never forget the first time I had kombucha. I was browsing a health food store (which is one of my favorite mindless activities to do) and I was thirsty. I scanned the wall of awesome designed bottles touting life changing health benefits, and picked up something randomly labeled kombucha. 10 minutes later I’m driving down the road, pop it open and take a swig. GROSS! It was intense. I don’t like or drink beer and it really tasted like some kind of funky beer to me. I scanned the label while pulling onto I-5 and realized it did contain alcohol. CRAP! I quickly put the lid back on and threw it under the seat thinking this would surely be the day I got pulled for a random car search. Tthey would never believe that I was just thirsty and fell for a cool label on a drink and had no idea what it was.
IMG_8897
So that happened & at least I knew that whatever kombucha was – I didn’t like it. I did aquire a taste for the coconut probiotic drinks though, and could see the benefits when I would consume them on occasion. Several years after my initial kombucha experience I decided to open my mind again and tried another one. Not sure if it changed or if I am just way more of a hippy now, but I really kind of liked the taste and knew it had some amazing gut health benefits which gave me more reason to give it a chance.

Fast forward to today and you’ll find a large jar housing our scoby (my 6 year old named it ‘Ron’) on the kitchen counter and an entire kombucha brewing shelf in the work room housing our 2nd brew and our scoby hotel.

No doubt if you’ve visited my house for any reason lately, you’ve not left until you tried one of my latest creations. I find it really funny to insist that visitors (even ones I just met) try my kombucha. So proud of that stuff!

As to not bore you further when I’m sure you just want the how-to {DIY} stuff, I’ll break that down in other posts and link it up here for you soon. You’re welcome.

Young Coconut Green Smoothies

This is tropical perfection in a cup! While working with fresh young Thai coconuts may be intimidating, it is quite easy, and the health benefits of coconuts are an amazing addition to your morning smoothie. Coconut water is a great source of potassium (as much as 4 bananas) and is chock full of minerals that your body needs to function optimally. The white ‘meat’ of the coconut is a great source of fiber and medium chain fatty acids (healthy fats), which your body uses for energy, healthy skin and proper brain function!

For this creation, you will need…

  • Fresh young Thai coconut
  • 2 cups of organic baby spinach
  • 4-5 pitted dates
  • 1 Tbsp organic vanilla extract
  • handful of ice
  • 1 tsp organic cinnamon

First you need to crack open the coconut. IMG_8899
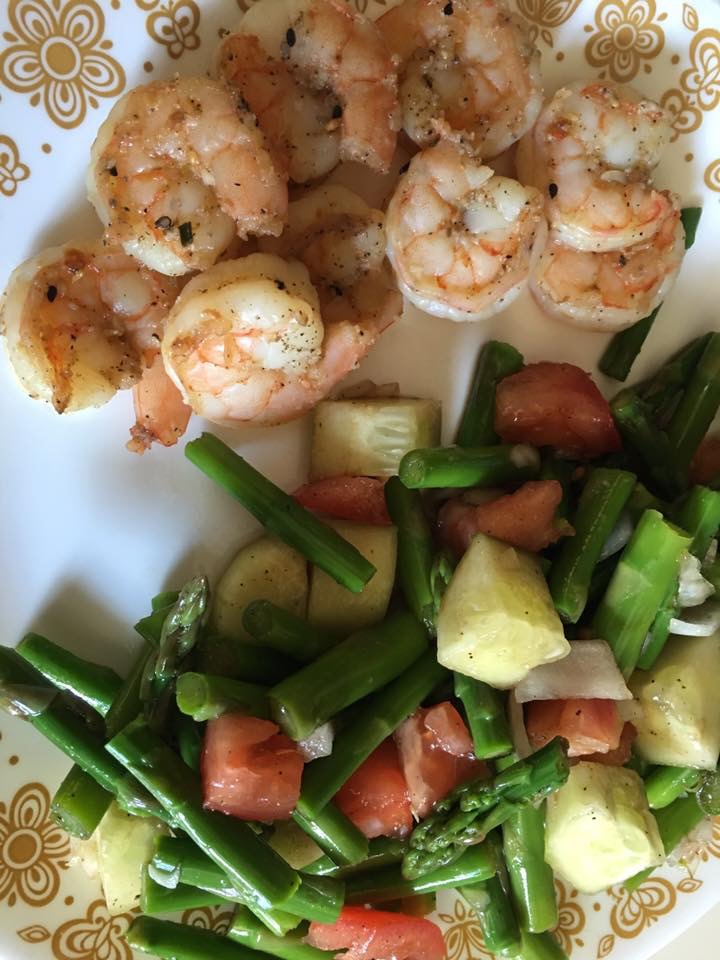
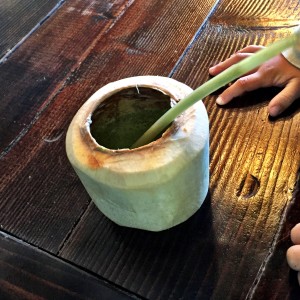
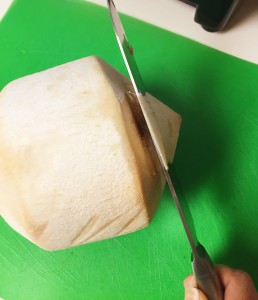
It’s not as hard as it sounds, but it does take some getting used to. Find the largest, sharpest knife in the kitchen (assuming you don’t have a machete handy). Start at the point and cut away the white part until you uncover the entire top of the brown nut inside.

IMG_8900
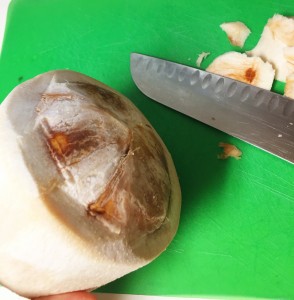
At this point be CAREFUL NOT TO LOSE YOUR FINGERS and take the bottom corner of the knife and drive it into the base of the top a few times (careful not to spill out the water once you break into it). Once you get a good crack, you can wedge your knife in and pop the top right off like a lid (coconuts completely amaze me).
Carefully pour the coconut water into your vitamix or blender (maybe drink a few sips along the way because it is delicious stuff). Take a large spoon and then scoop out the white ‘meat’ from the inside of the coconut. Scoop it all out into your blender. Add in spinach, vanilla, cinnamon, dates (to sweeten), and ice.

Blend on high speed until completely pureed. I like to add in our Wild Orange flavored liquid Omega 3s (these are critical for my little ones) and pour them into fun cups. (The omegas will change the flavor into more of an orange creamsicle, so those can be omitted if you don’t want that flavor.) One lucky kid gets the smoothie served back out of the coconut shell. There is nothing better than the taste of fresh coconut to start out your morning feeling happy and healthy! Let me know if you try this, or have any questions!IMG_8879